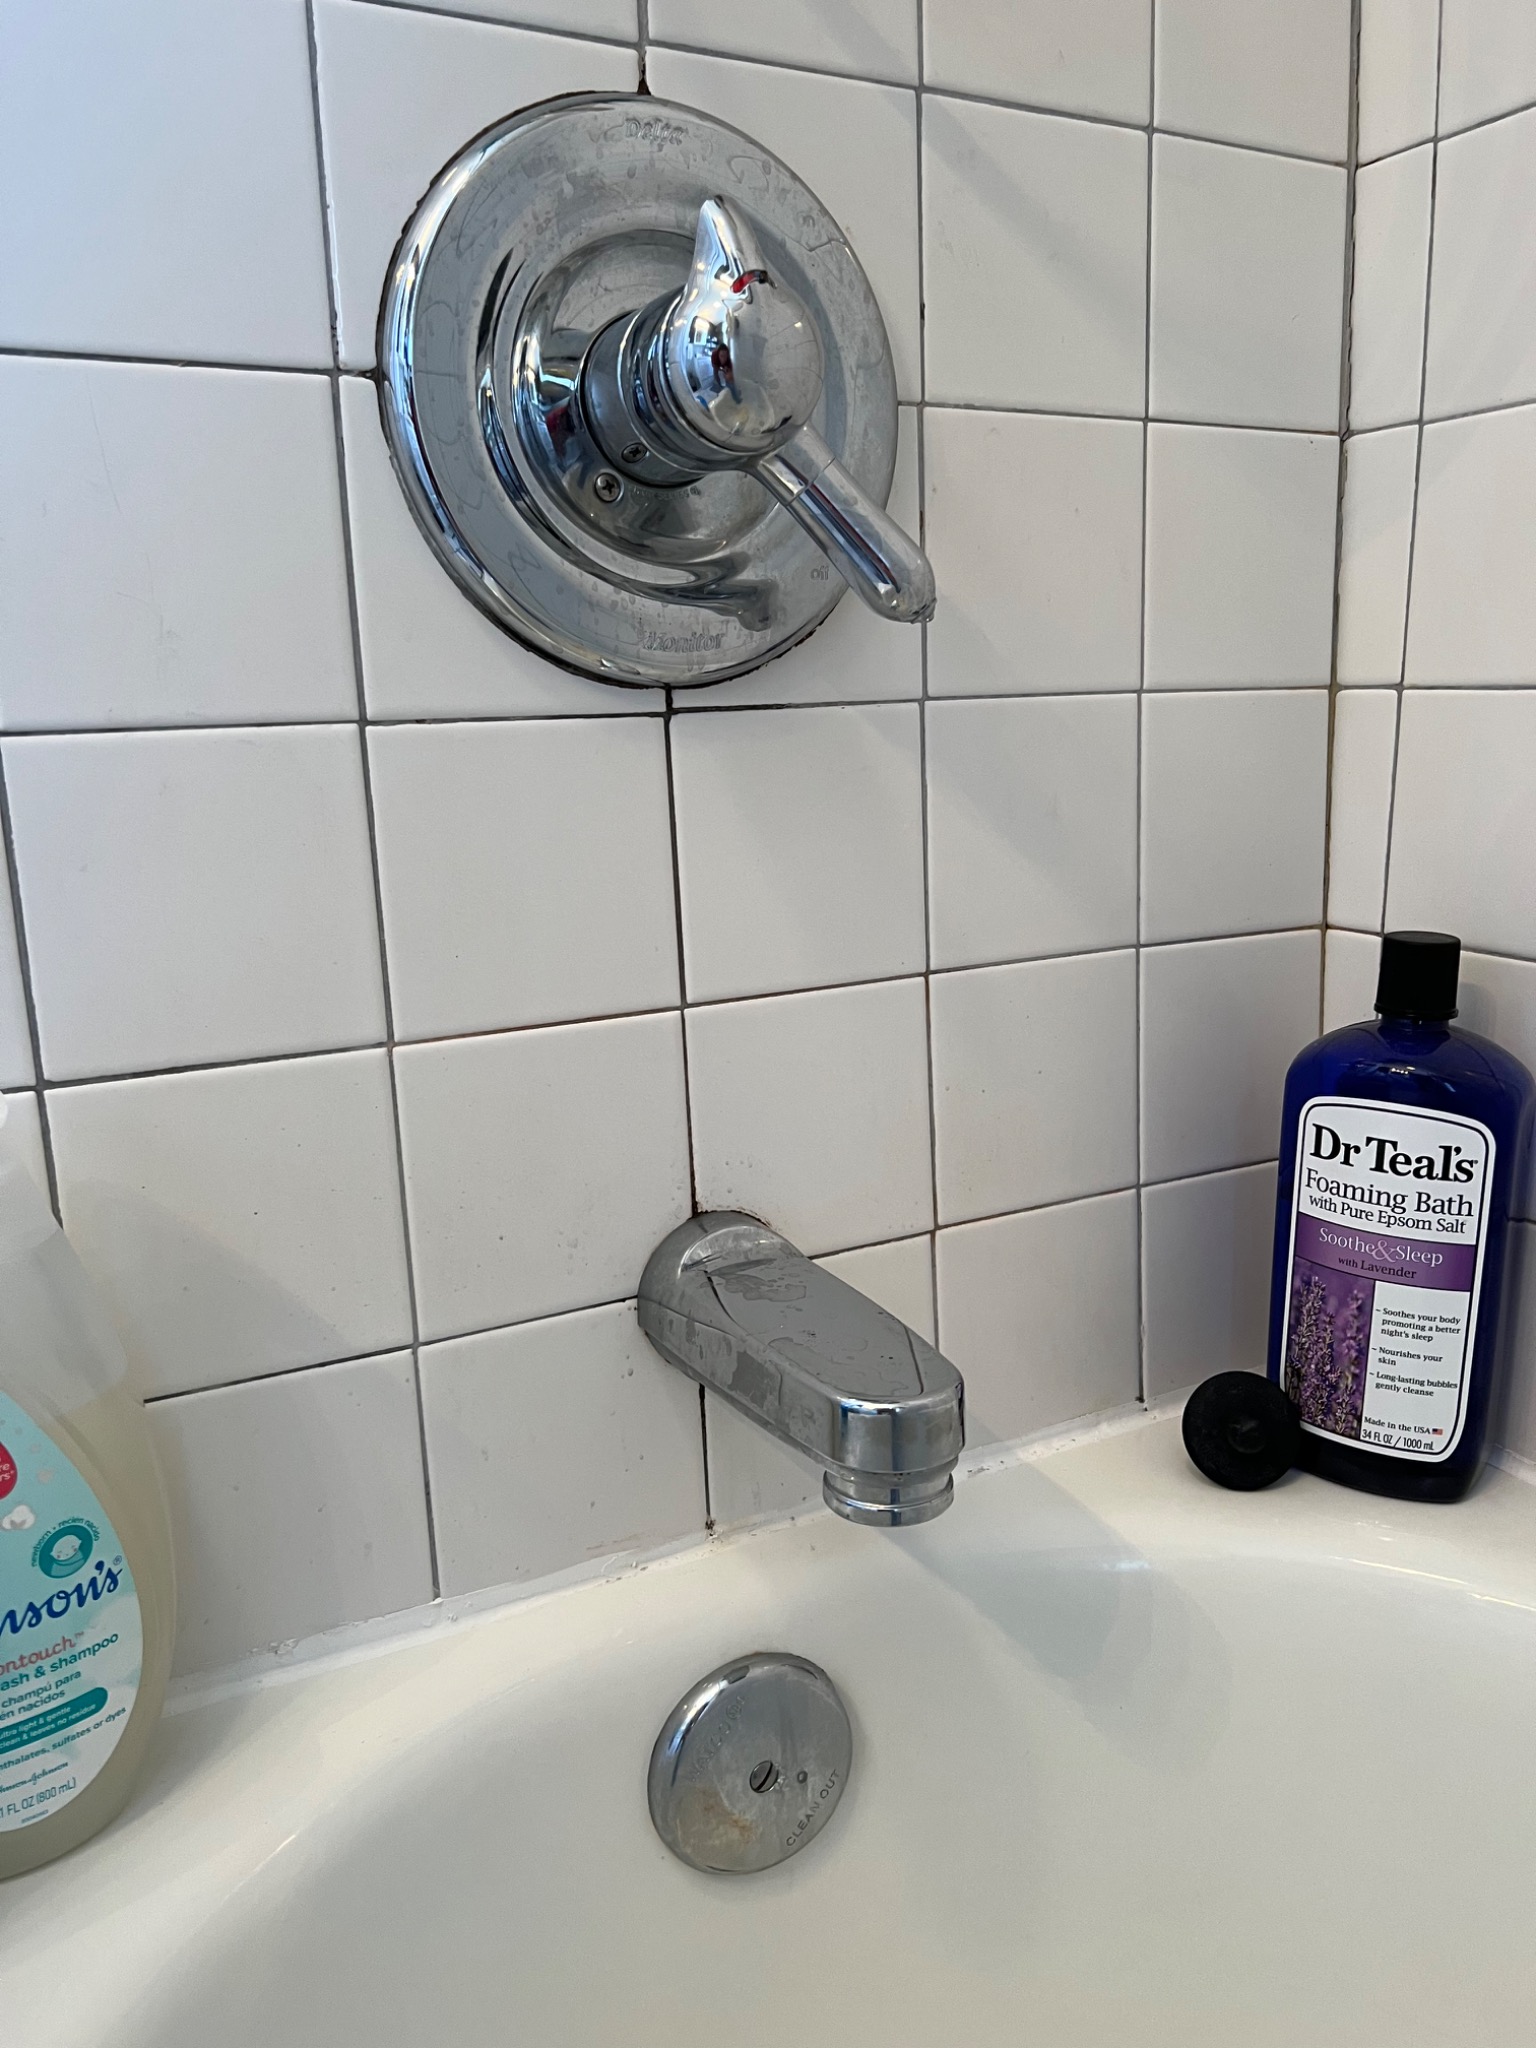
How to fix a leaking Delta Monitor 1700 Series shower faucet
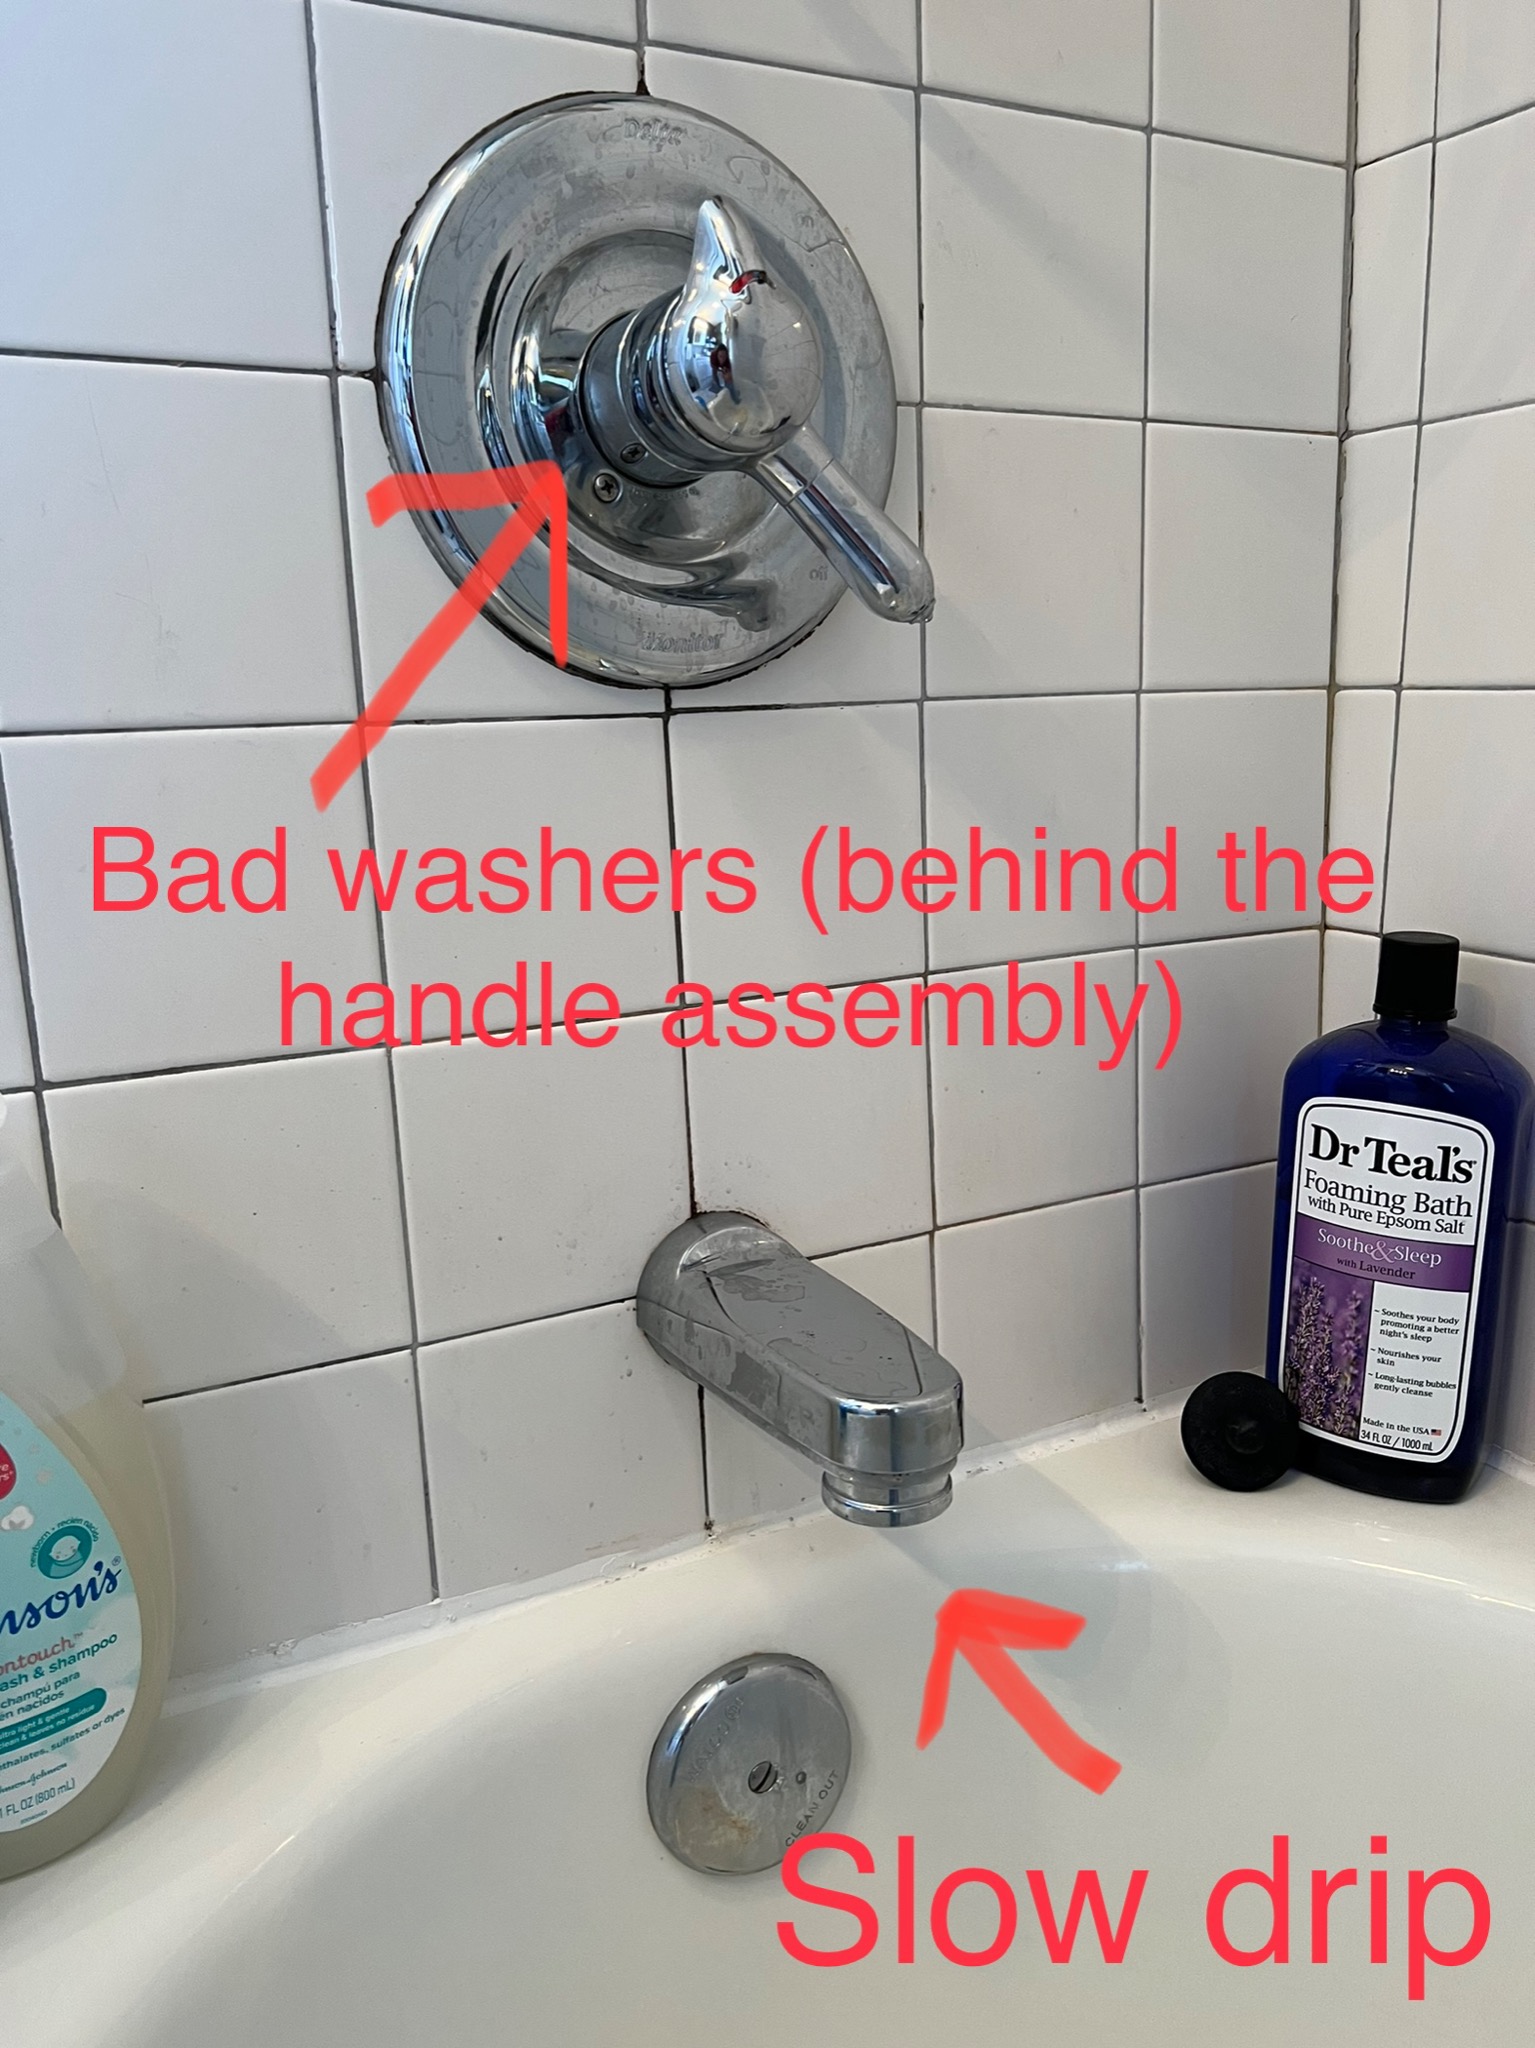
The Problem
The faucet is leaking/dripping when it is in the "off position." The issue is that the washers behind the handle/knob assembly are bad and not completely stopping the flow of water to the faucet.
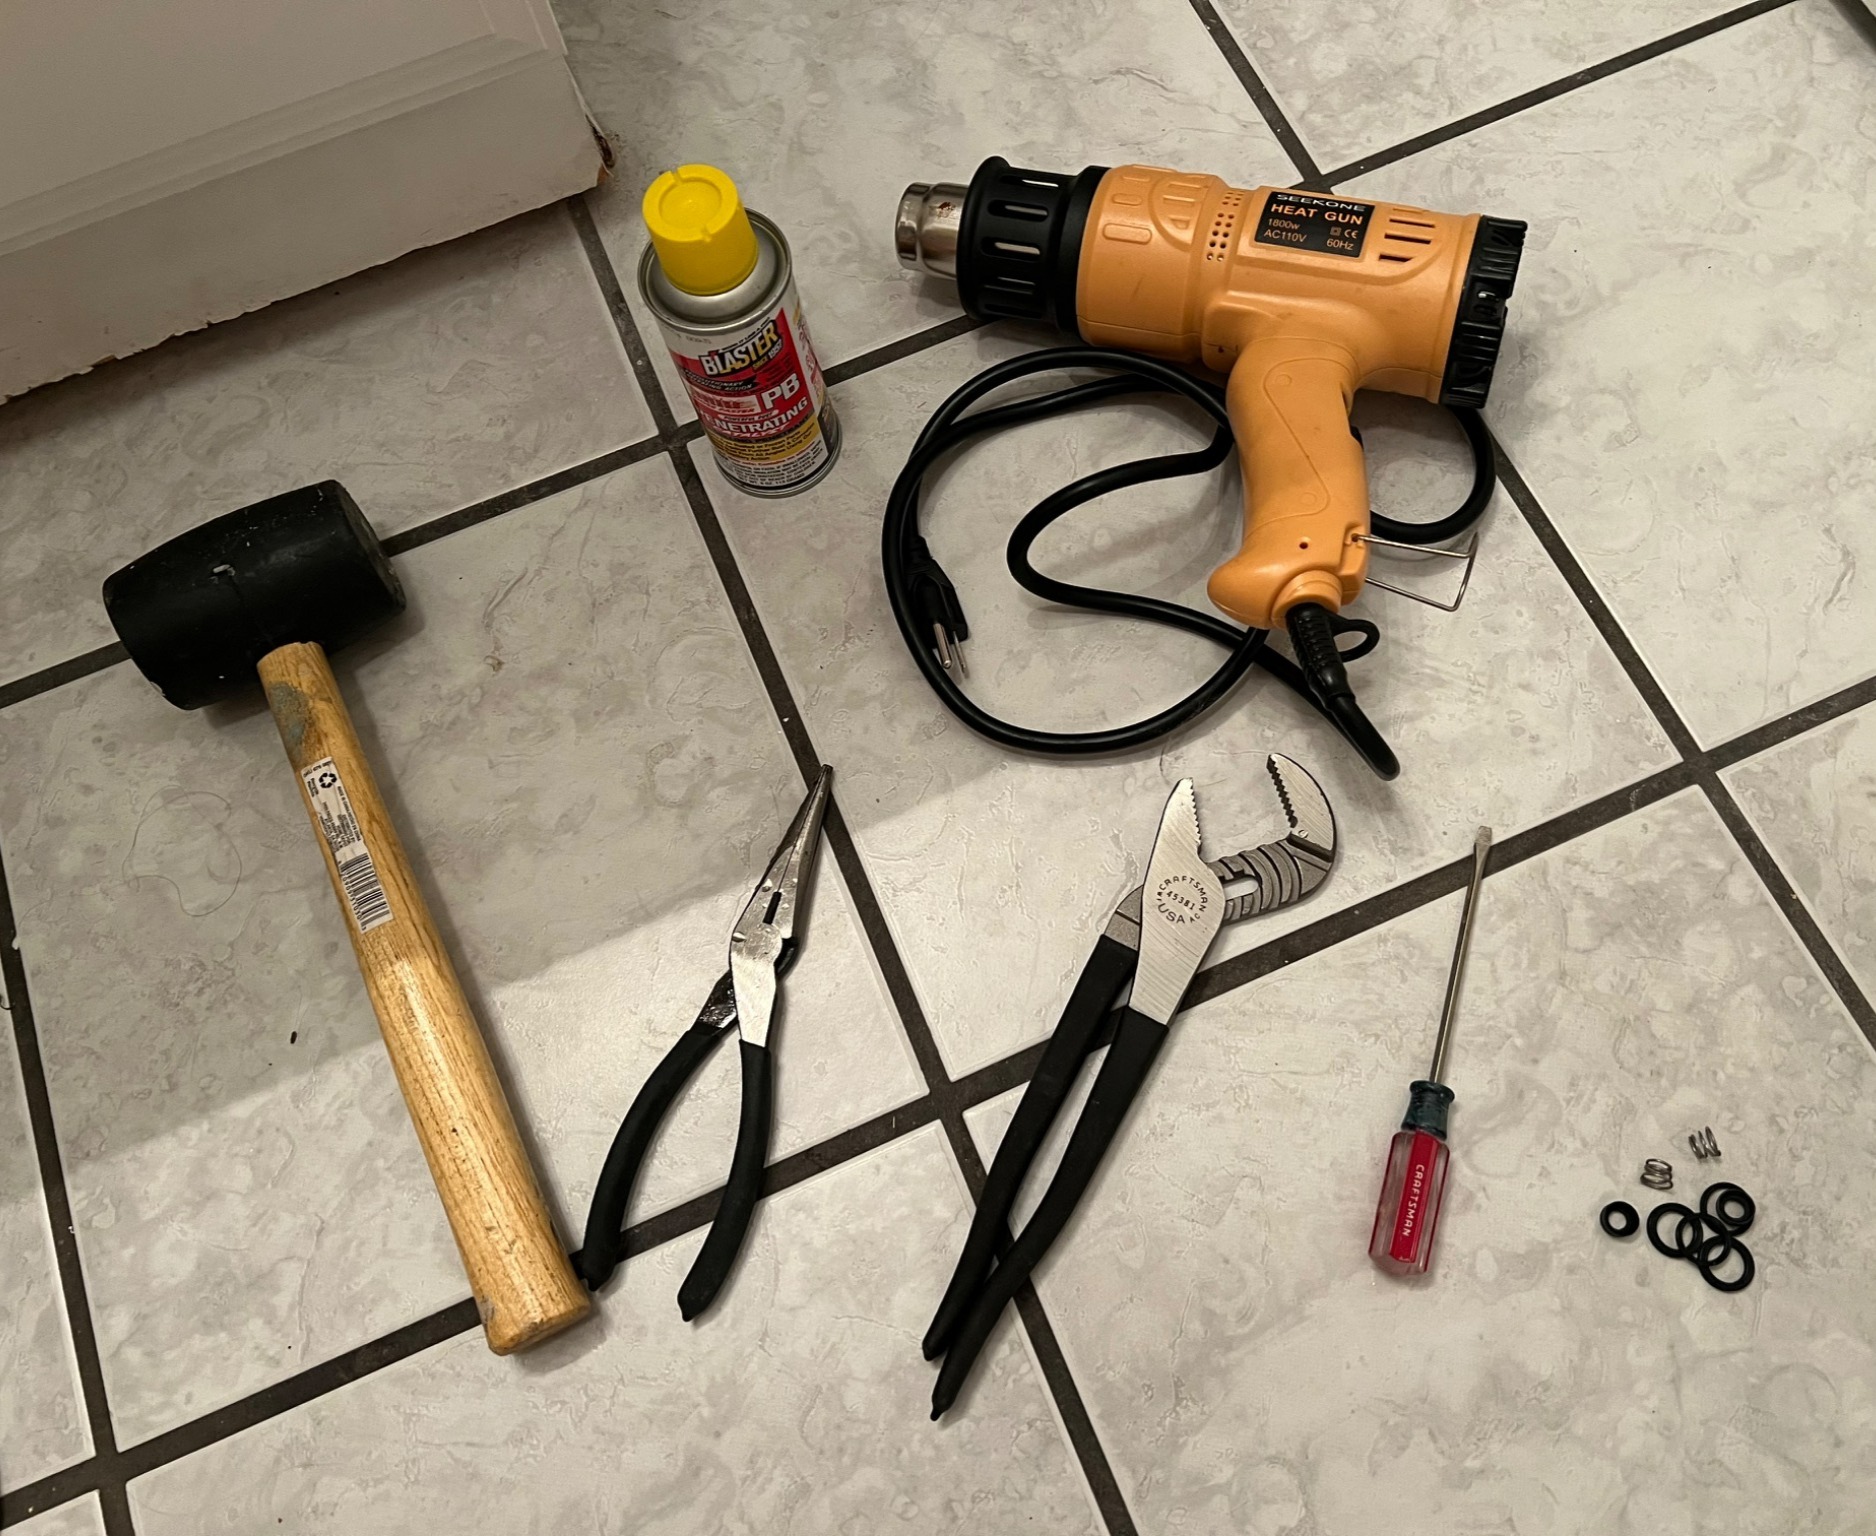
Required Tools
Here are the tools that you will likely need for this project:
Summary
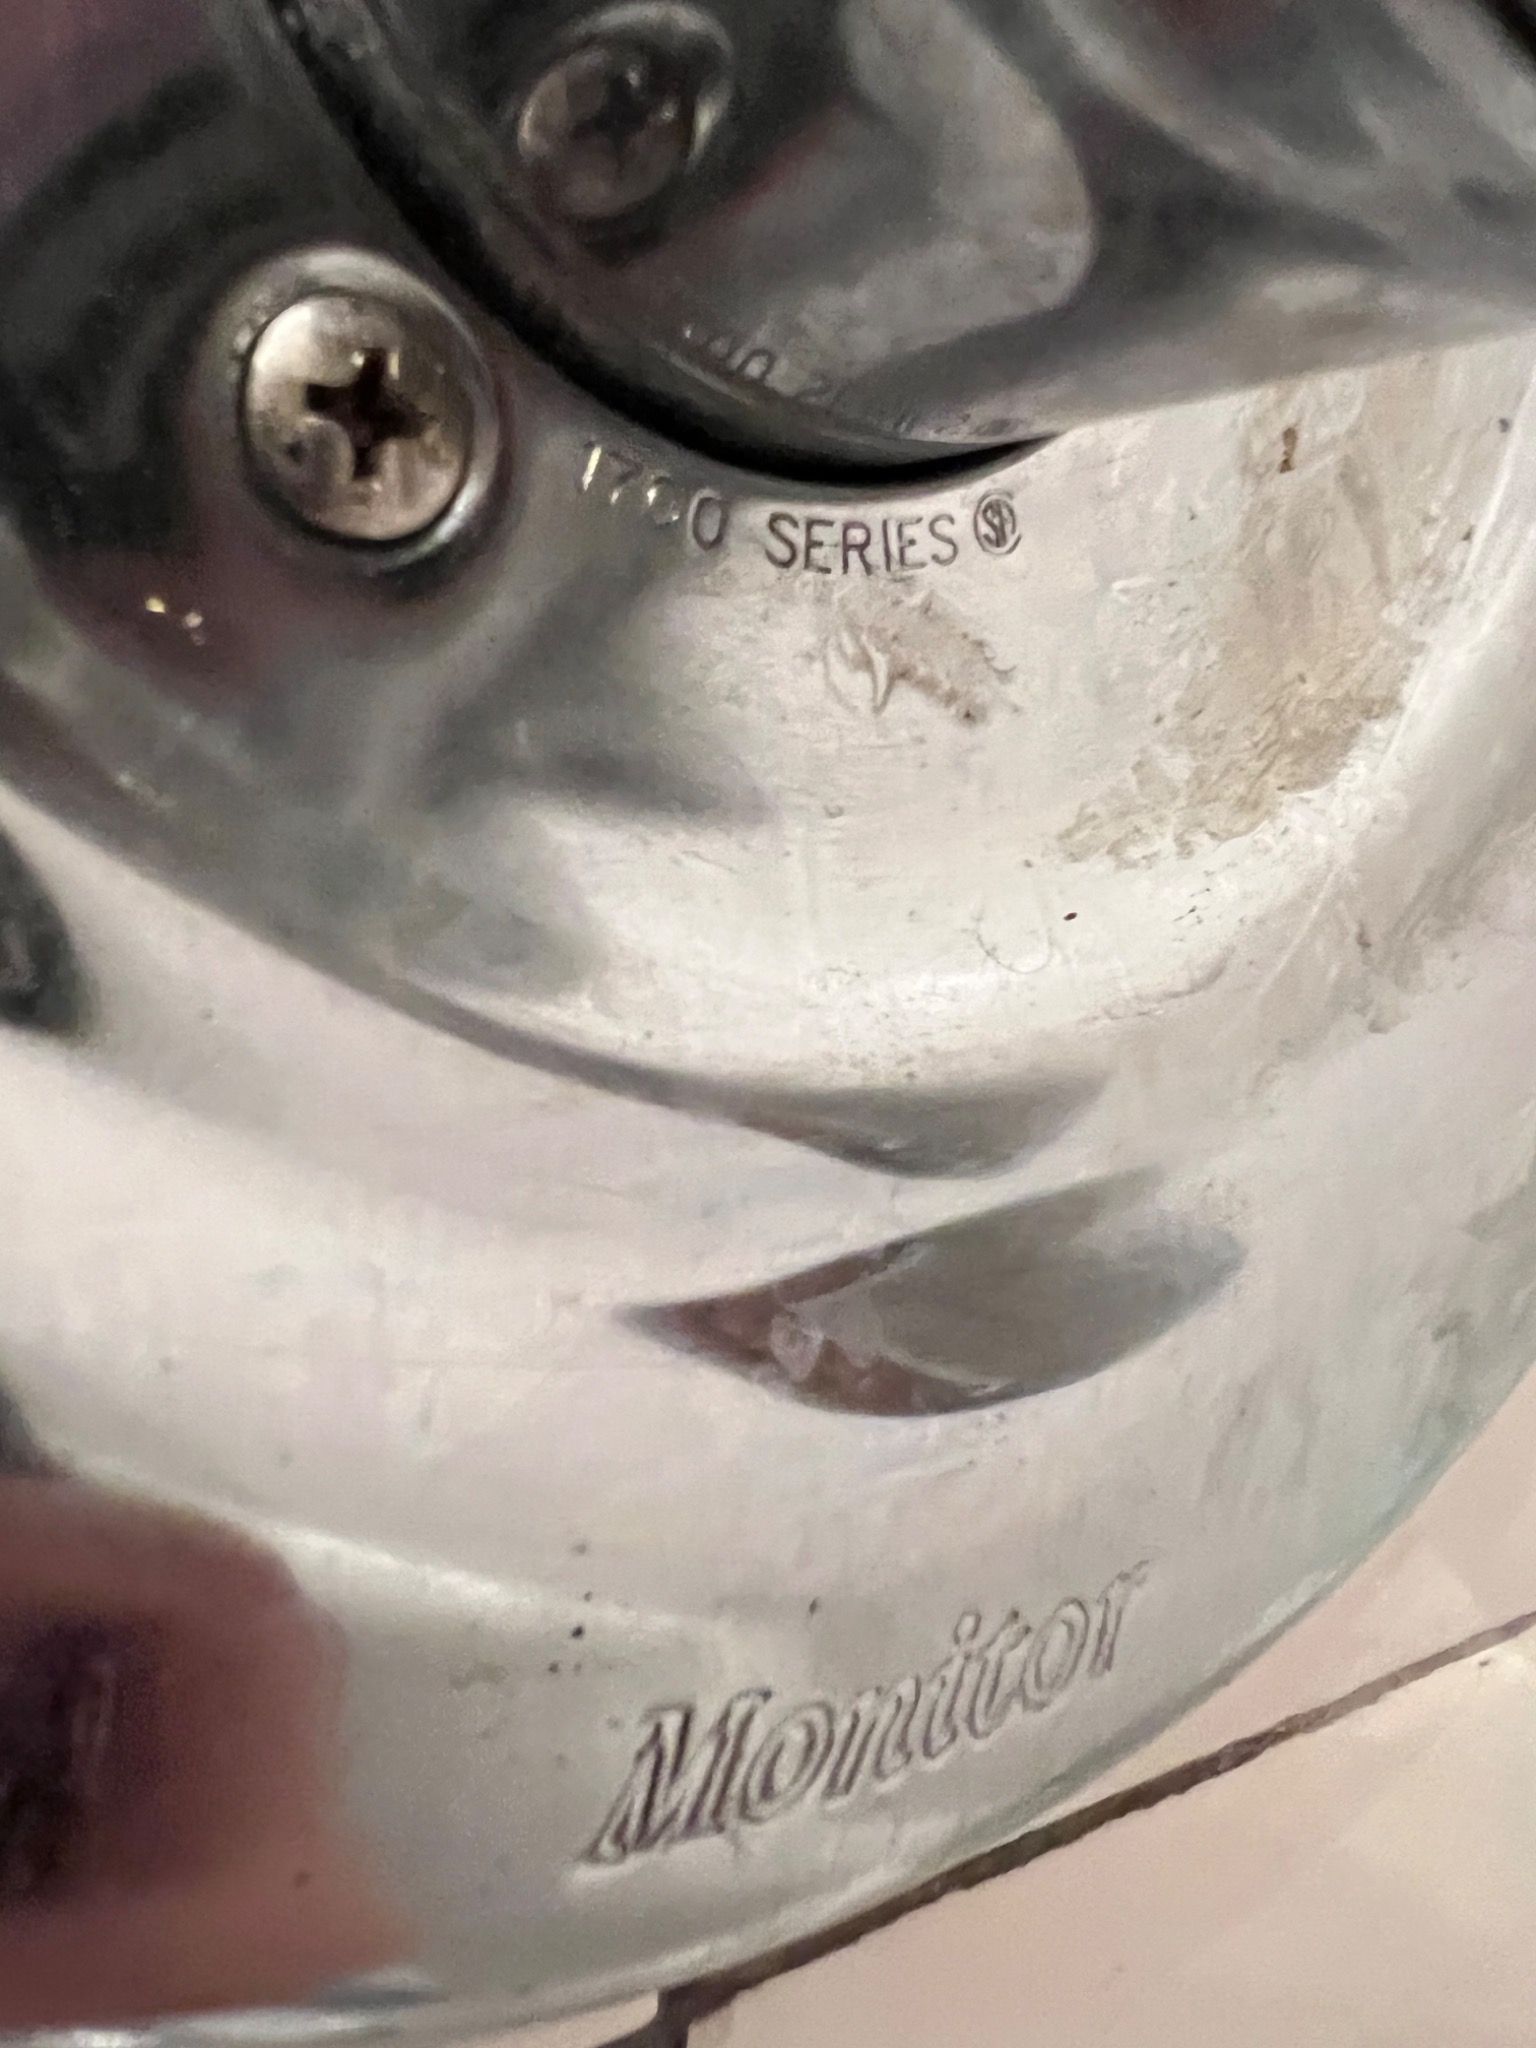
1) Check the make and model of your faucet.
2) Call Delta Faucet.
3) Turn off the water.
4) Plug the drain.
5) Take apart the exterior assembly.
6) Remove the bonnet nut (brass ring).
7) Remove the cartridge.
8) Remove the old springs and washers.
9) Install the new springs and washers.
10) Put everything back together.
11) Unplug the the drain, turn the water back on, and test the cold-hot water range.
12) Turn off the water and make sure there is no leak/drip.
13) Enjoy your improved shower/bathtub faucet.
1) Check the make and model of your faucet.
Look on the plate underneath the handle. You can see that mine is the Delta Monitor 1700 Series. You may also see this called the 17 series--The two are the same.
If your faucet is not the 1700 series, then I suppose you have no interest in reading further. If your faucet is the 1700, or 17, series, then this article pertains to you!
2) Call Delta Faucet
It's well documented online that if you call Delta Faucet to explain your problem, they will send you your replacement parts for free! In my case, even though I hadn't personally bought and installed this faucet--The previous owners of my house did--When I called Delta Faucet and gave them my address, they were able to identify the exact product that I had, diagnose the cause of the leak, and send me the appropriate parts.
In this case, they said, when there is a slow drip from this faucet, the issue is almost always bad washers.
They put my new washers in the mail that day. Although my washers wouldn't arrive for a few days, you should continue on with the project. You will see how this can turn into a multi-day project. If you continue on now, you will likely be ready to install the new washers when they arrive.
3) Turn off the water.
4) Plug the drain.
Obviously, you don't want the water running as your are attempting the repair.
You don't want to accidentally drop a small, but important part (screw, washer, etc.) down the drain either.
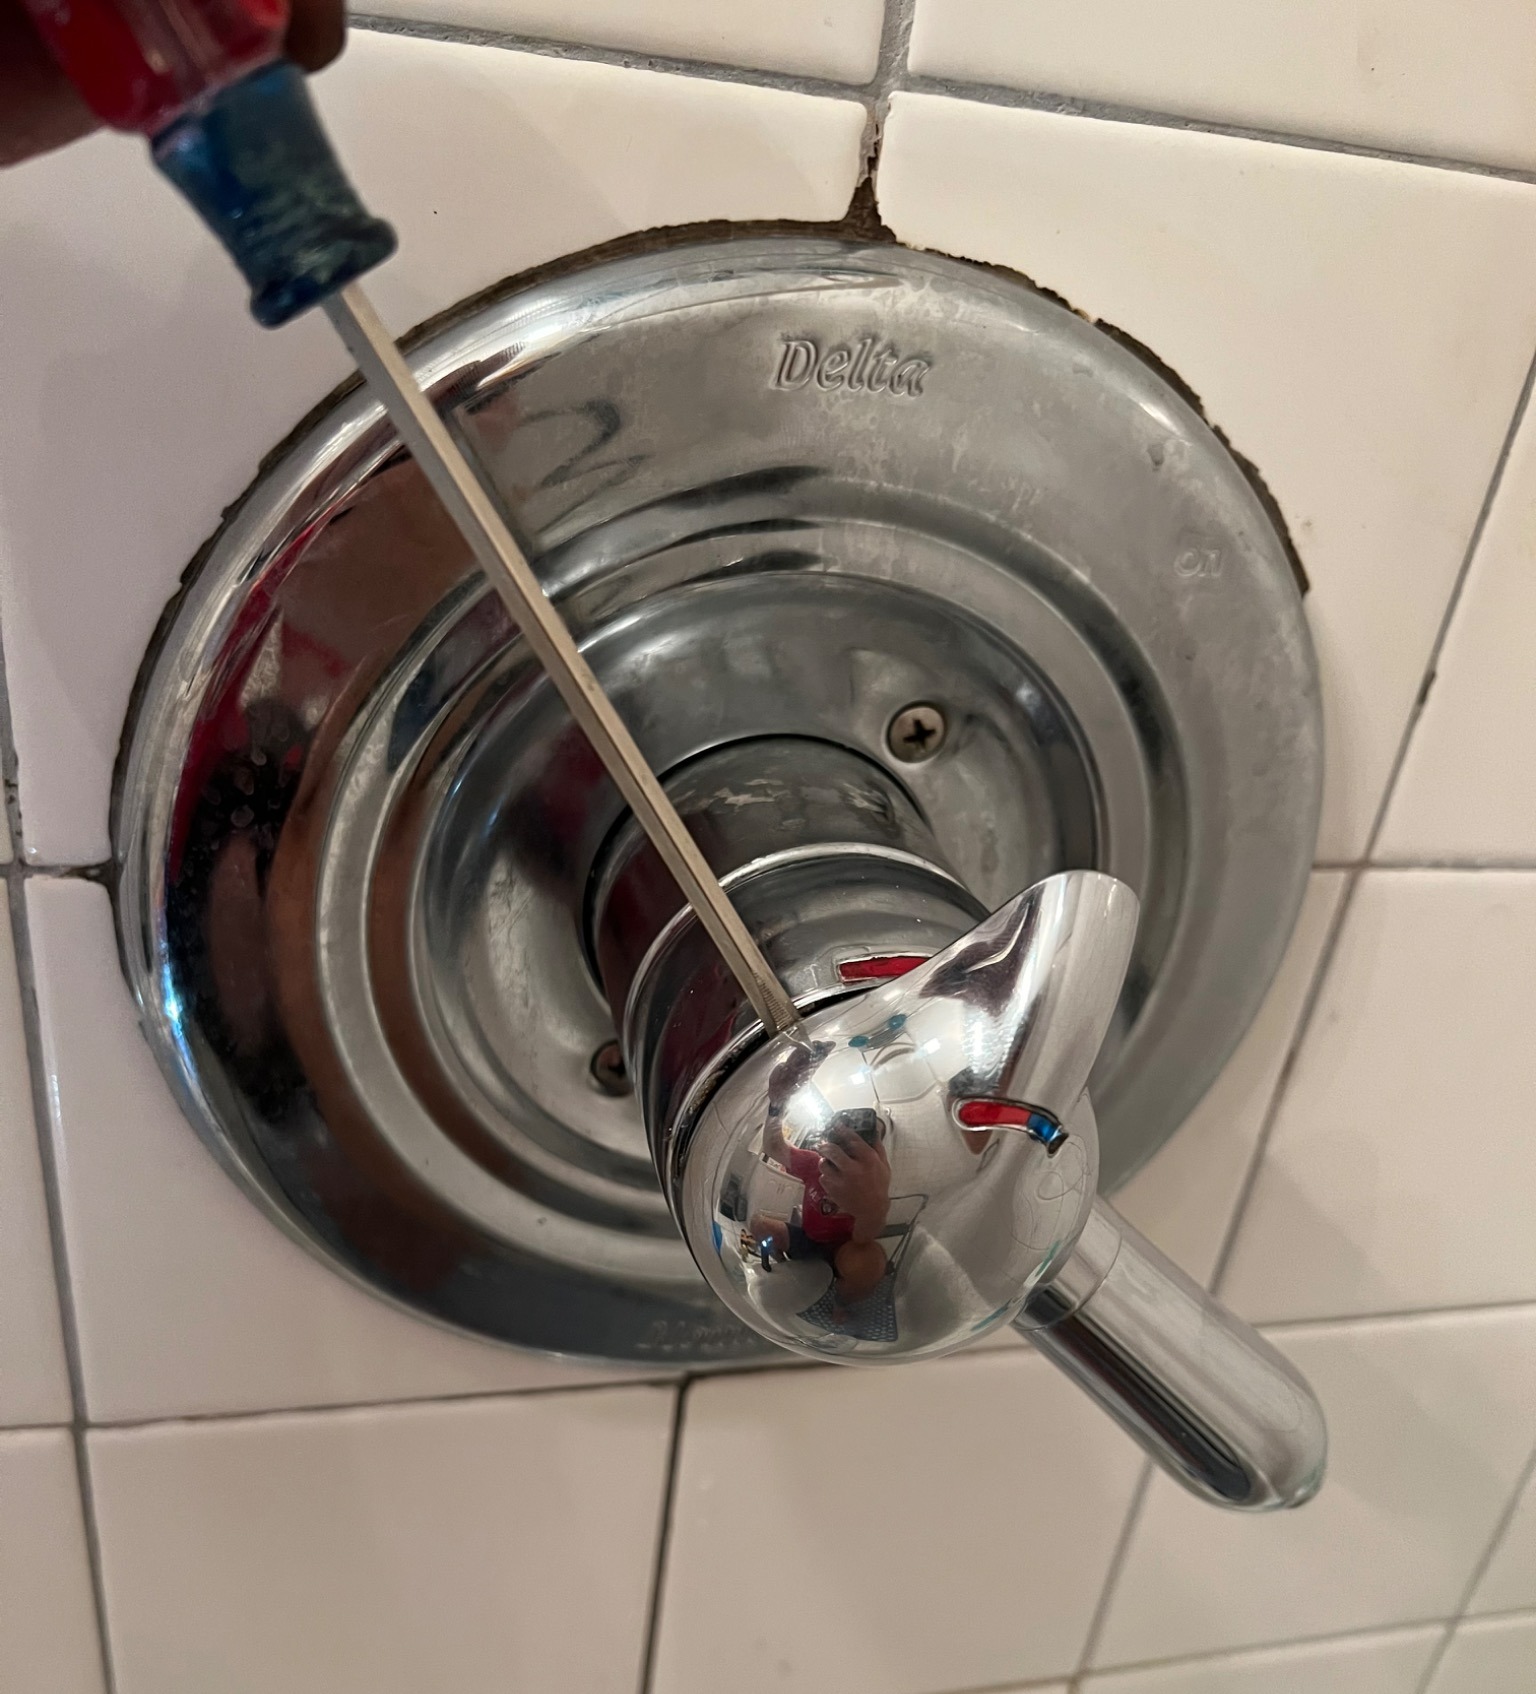
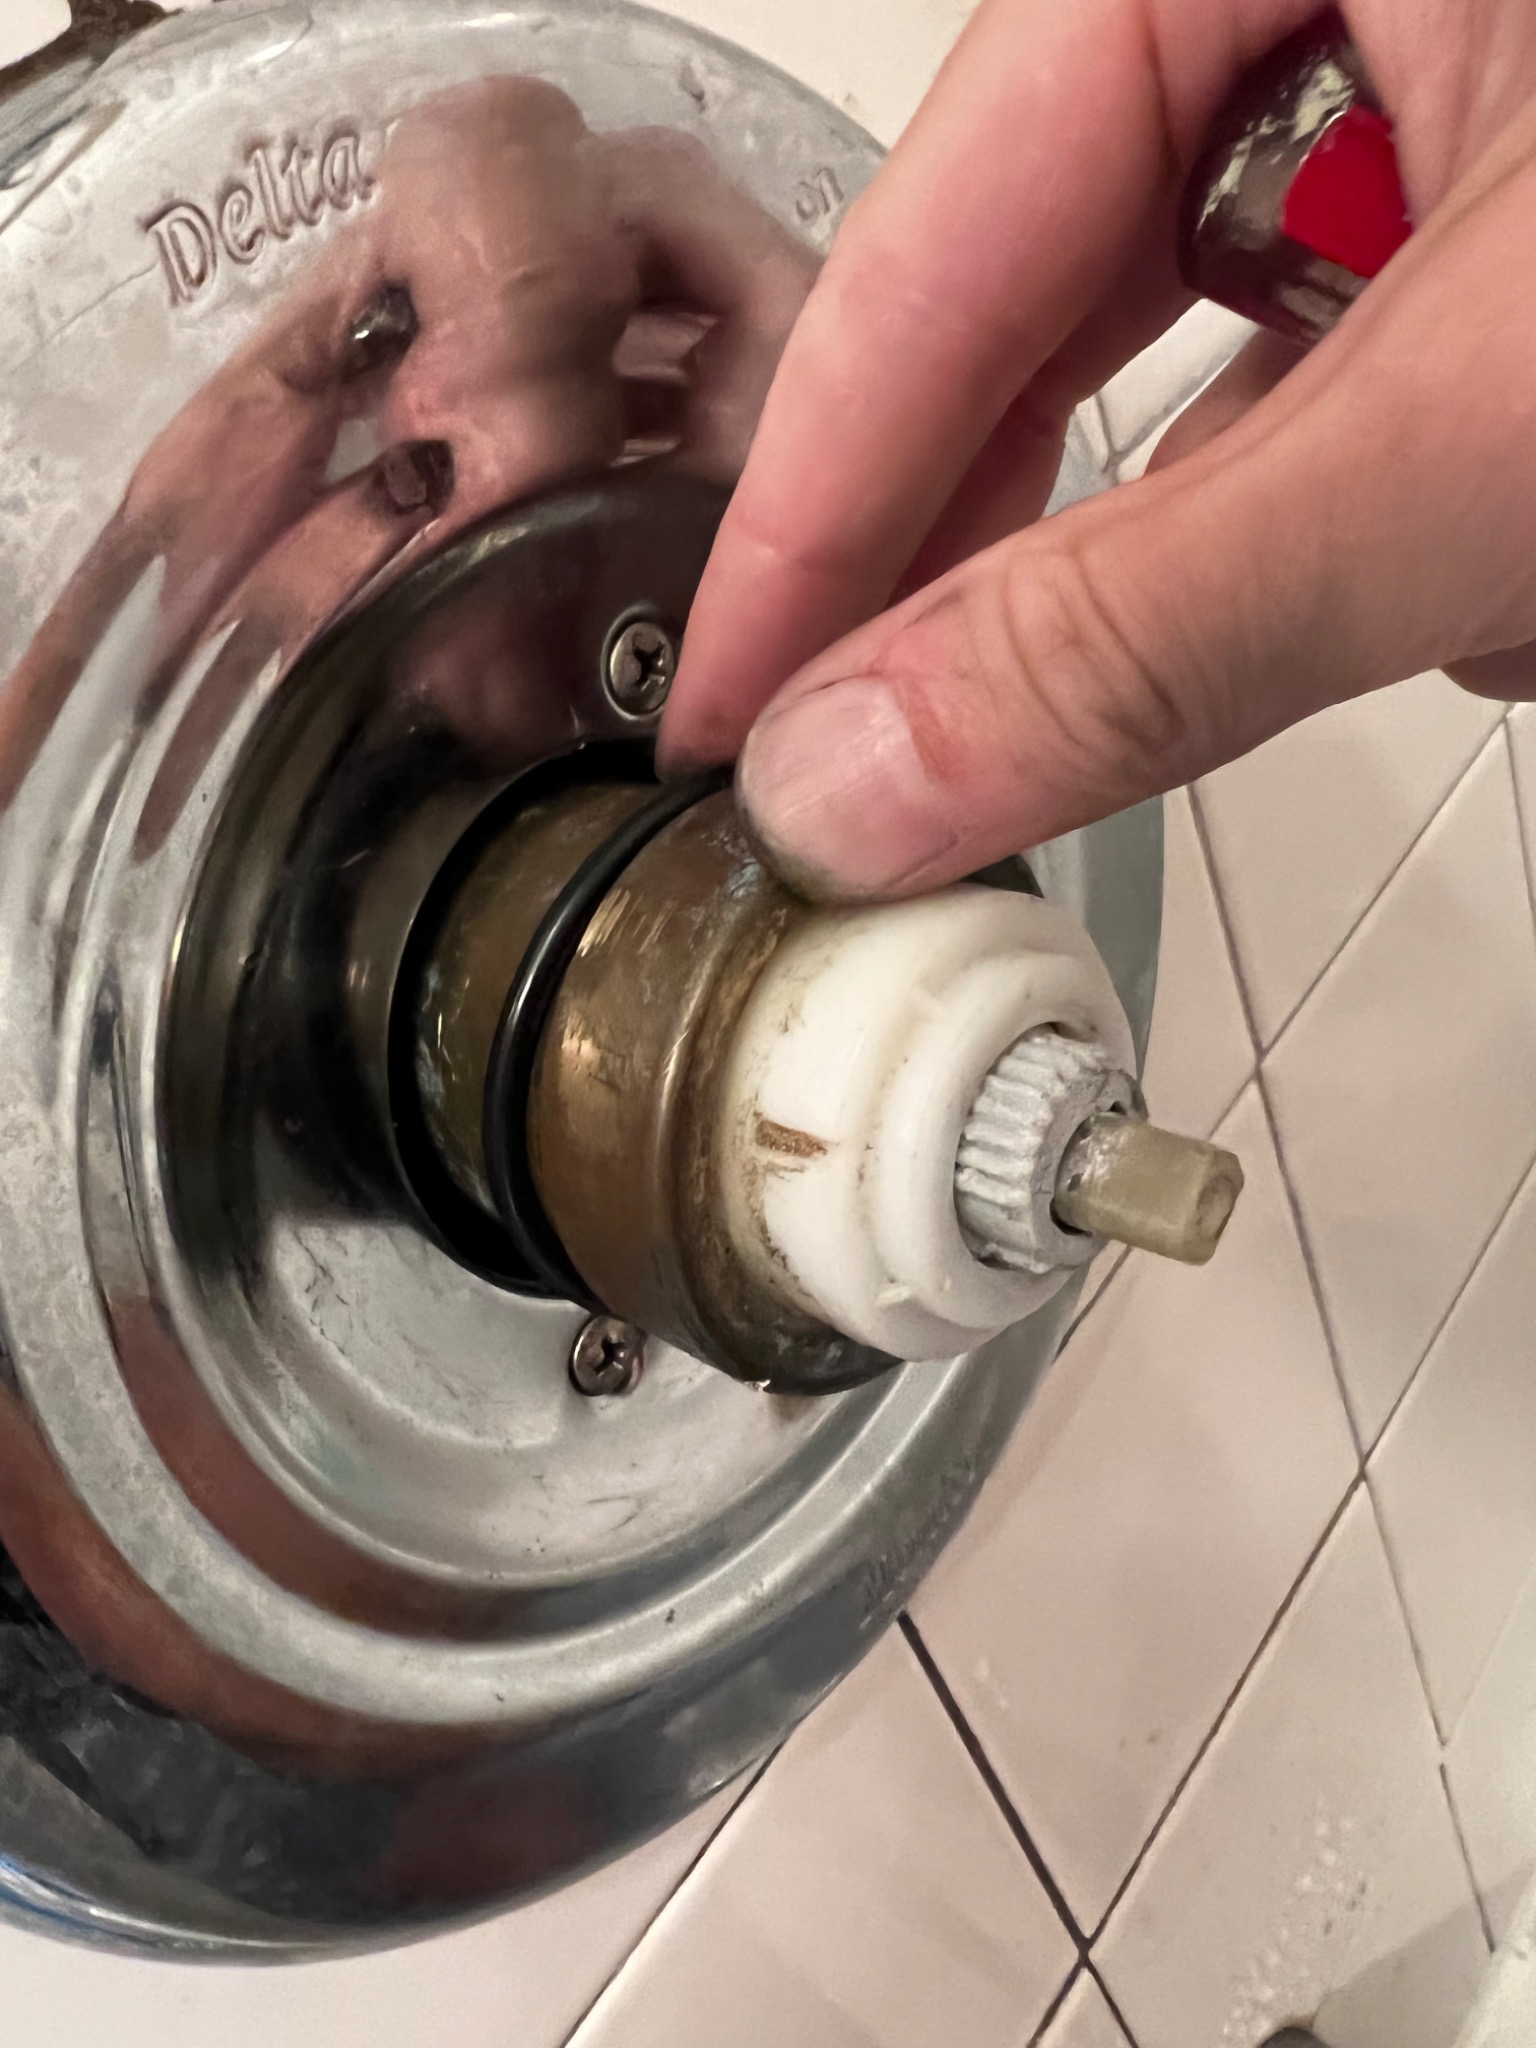
5) Take apart the exterior assembly.
Part 5 has a series of steps within it that we are going to call 5a - 5e.
If your faucet handle assembly was installed years ago and hasn't been taken apart before, this part could be tricky because some parts may be stuck together. It's an extremely simple process, but you still want to be delicate so that you don't damage any parts.
5a) Remove the cap.
Use a flathead screwdriver to pry the cap away.
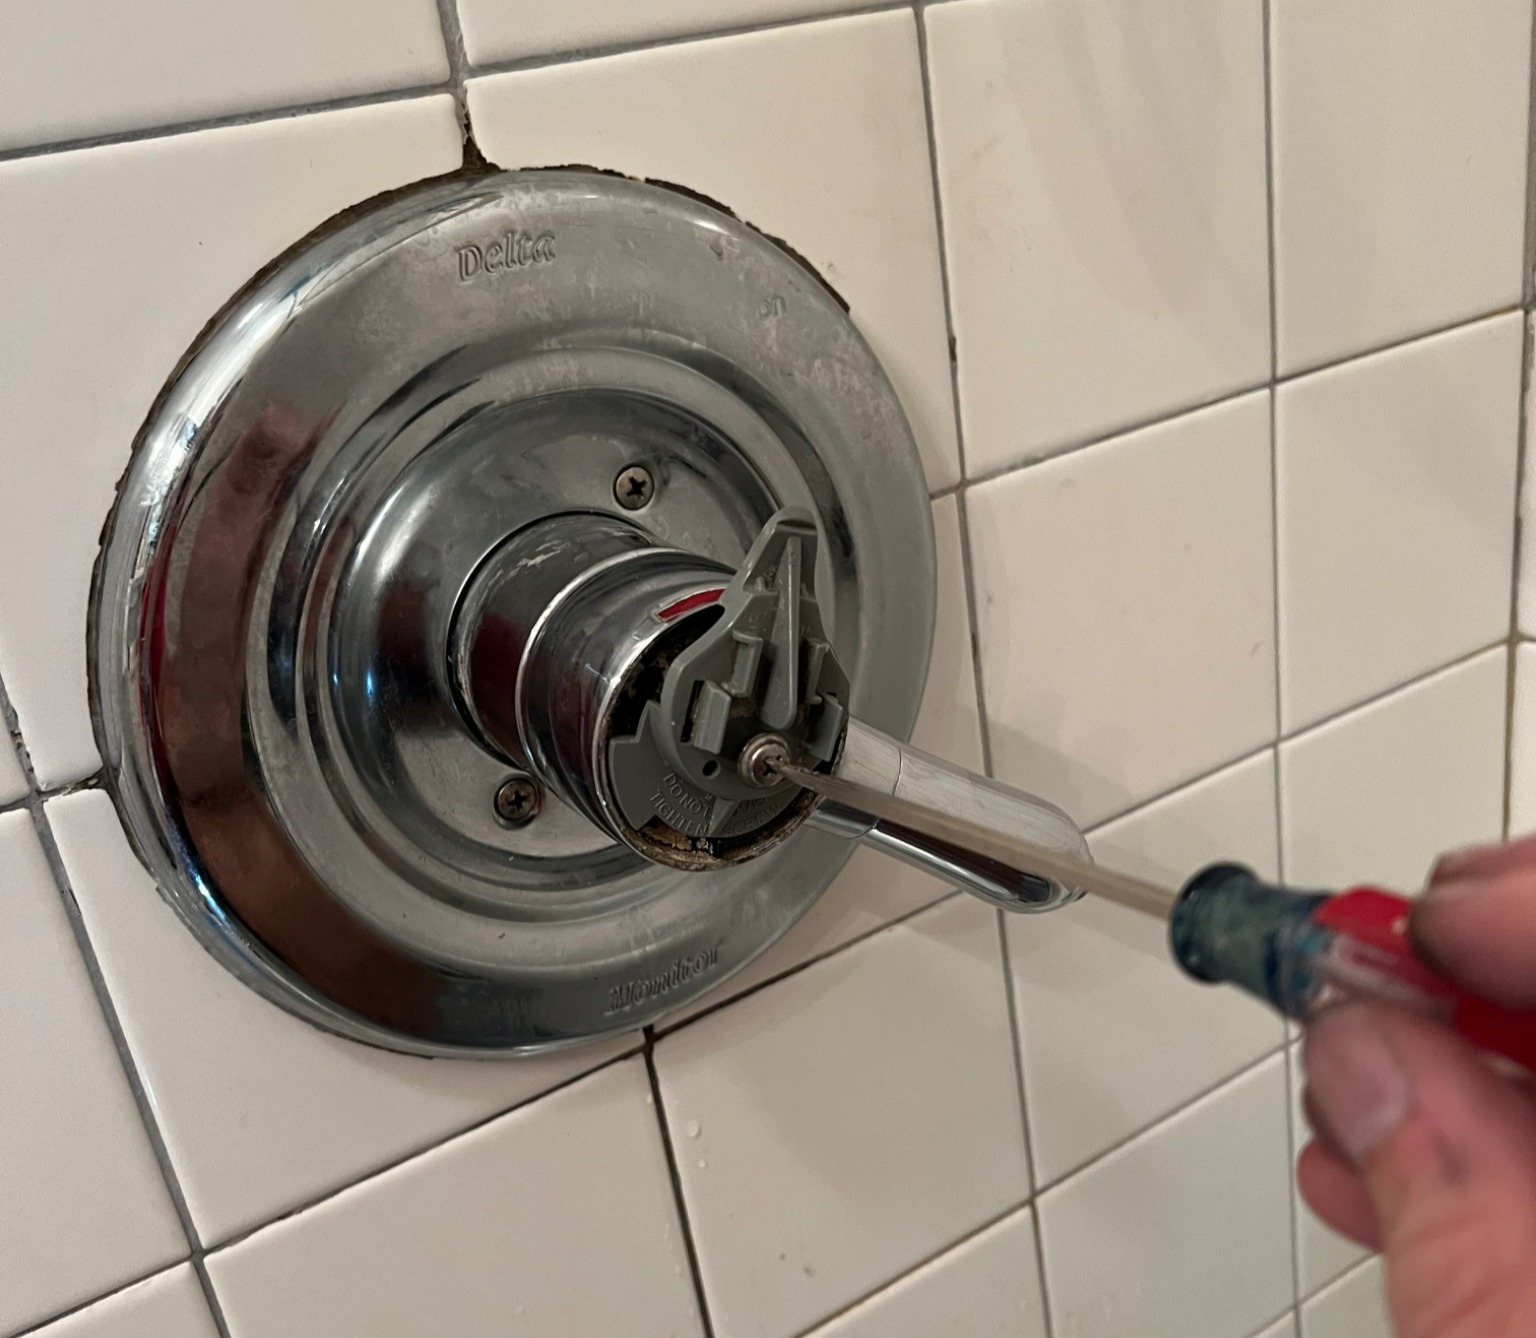
5b) Remove the temperature control knob.
Unscrew the screw that secures this part to the rest of the assembly.
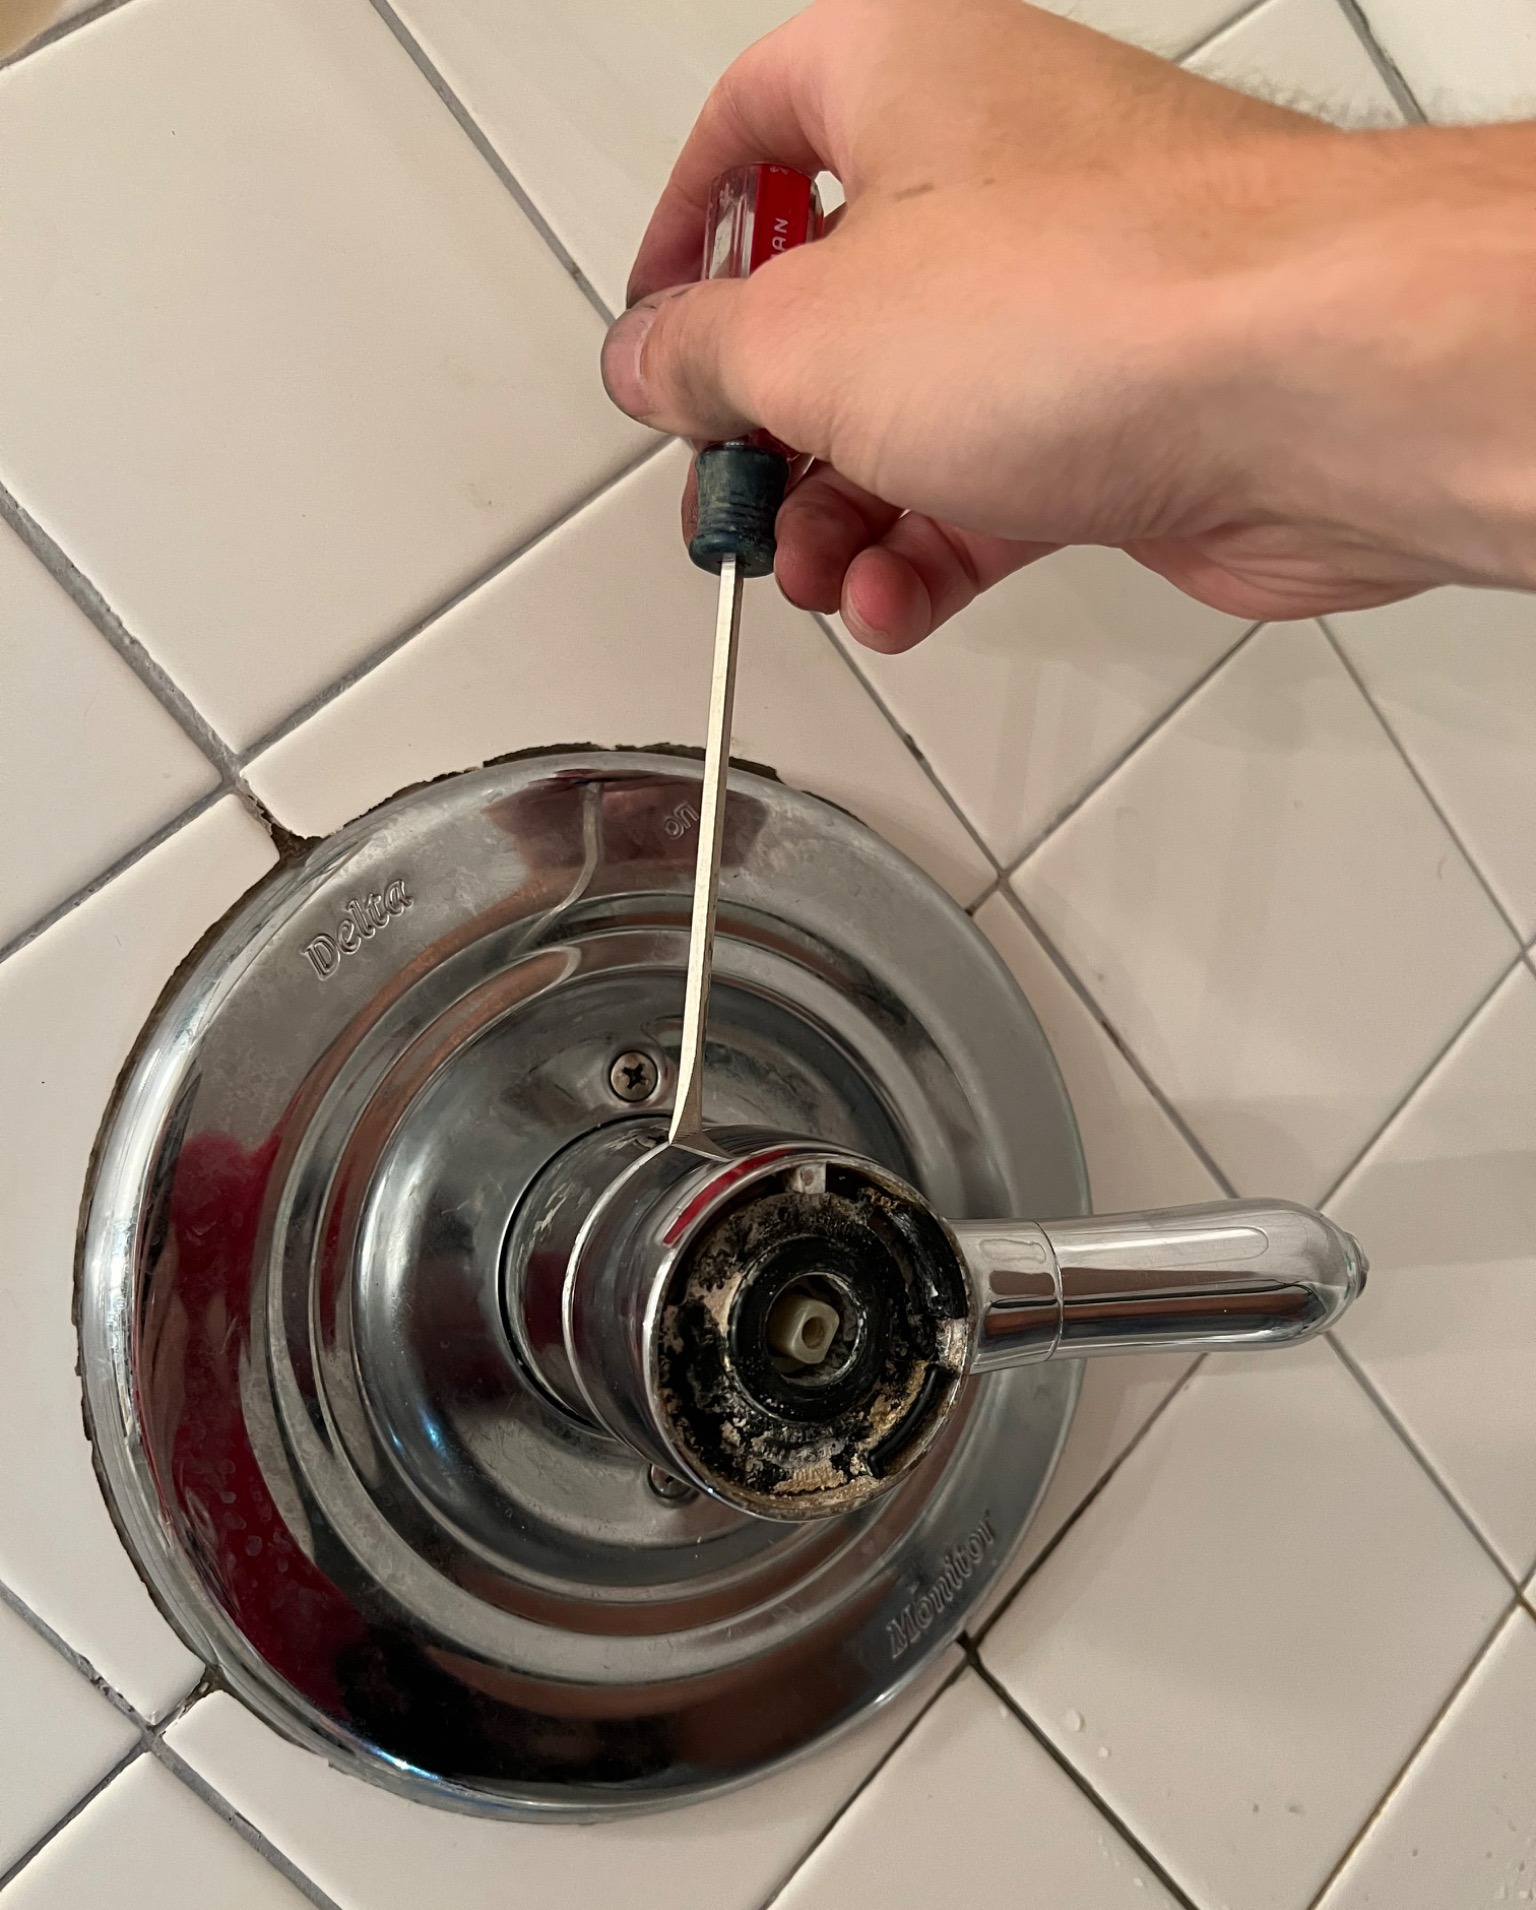
5c) Remove the handle.
Pry this part away using a flathead screwdriver.
5d) Remove the trim sleeve.
You should be able to wiggle this part out with your hand.
5e) Remove the trim sleeve rubber band.
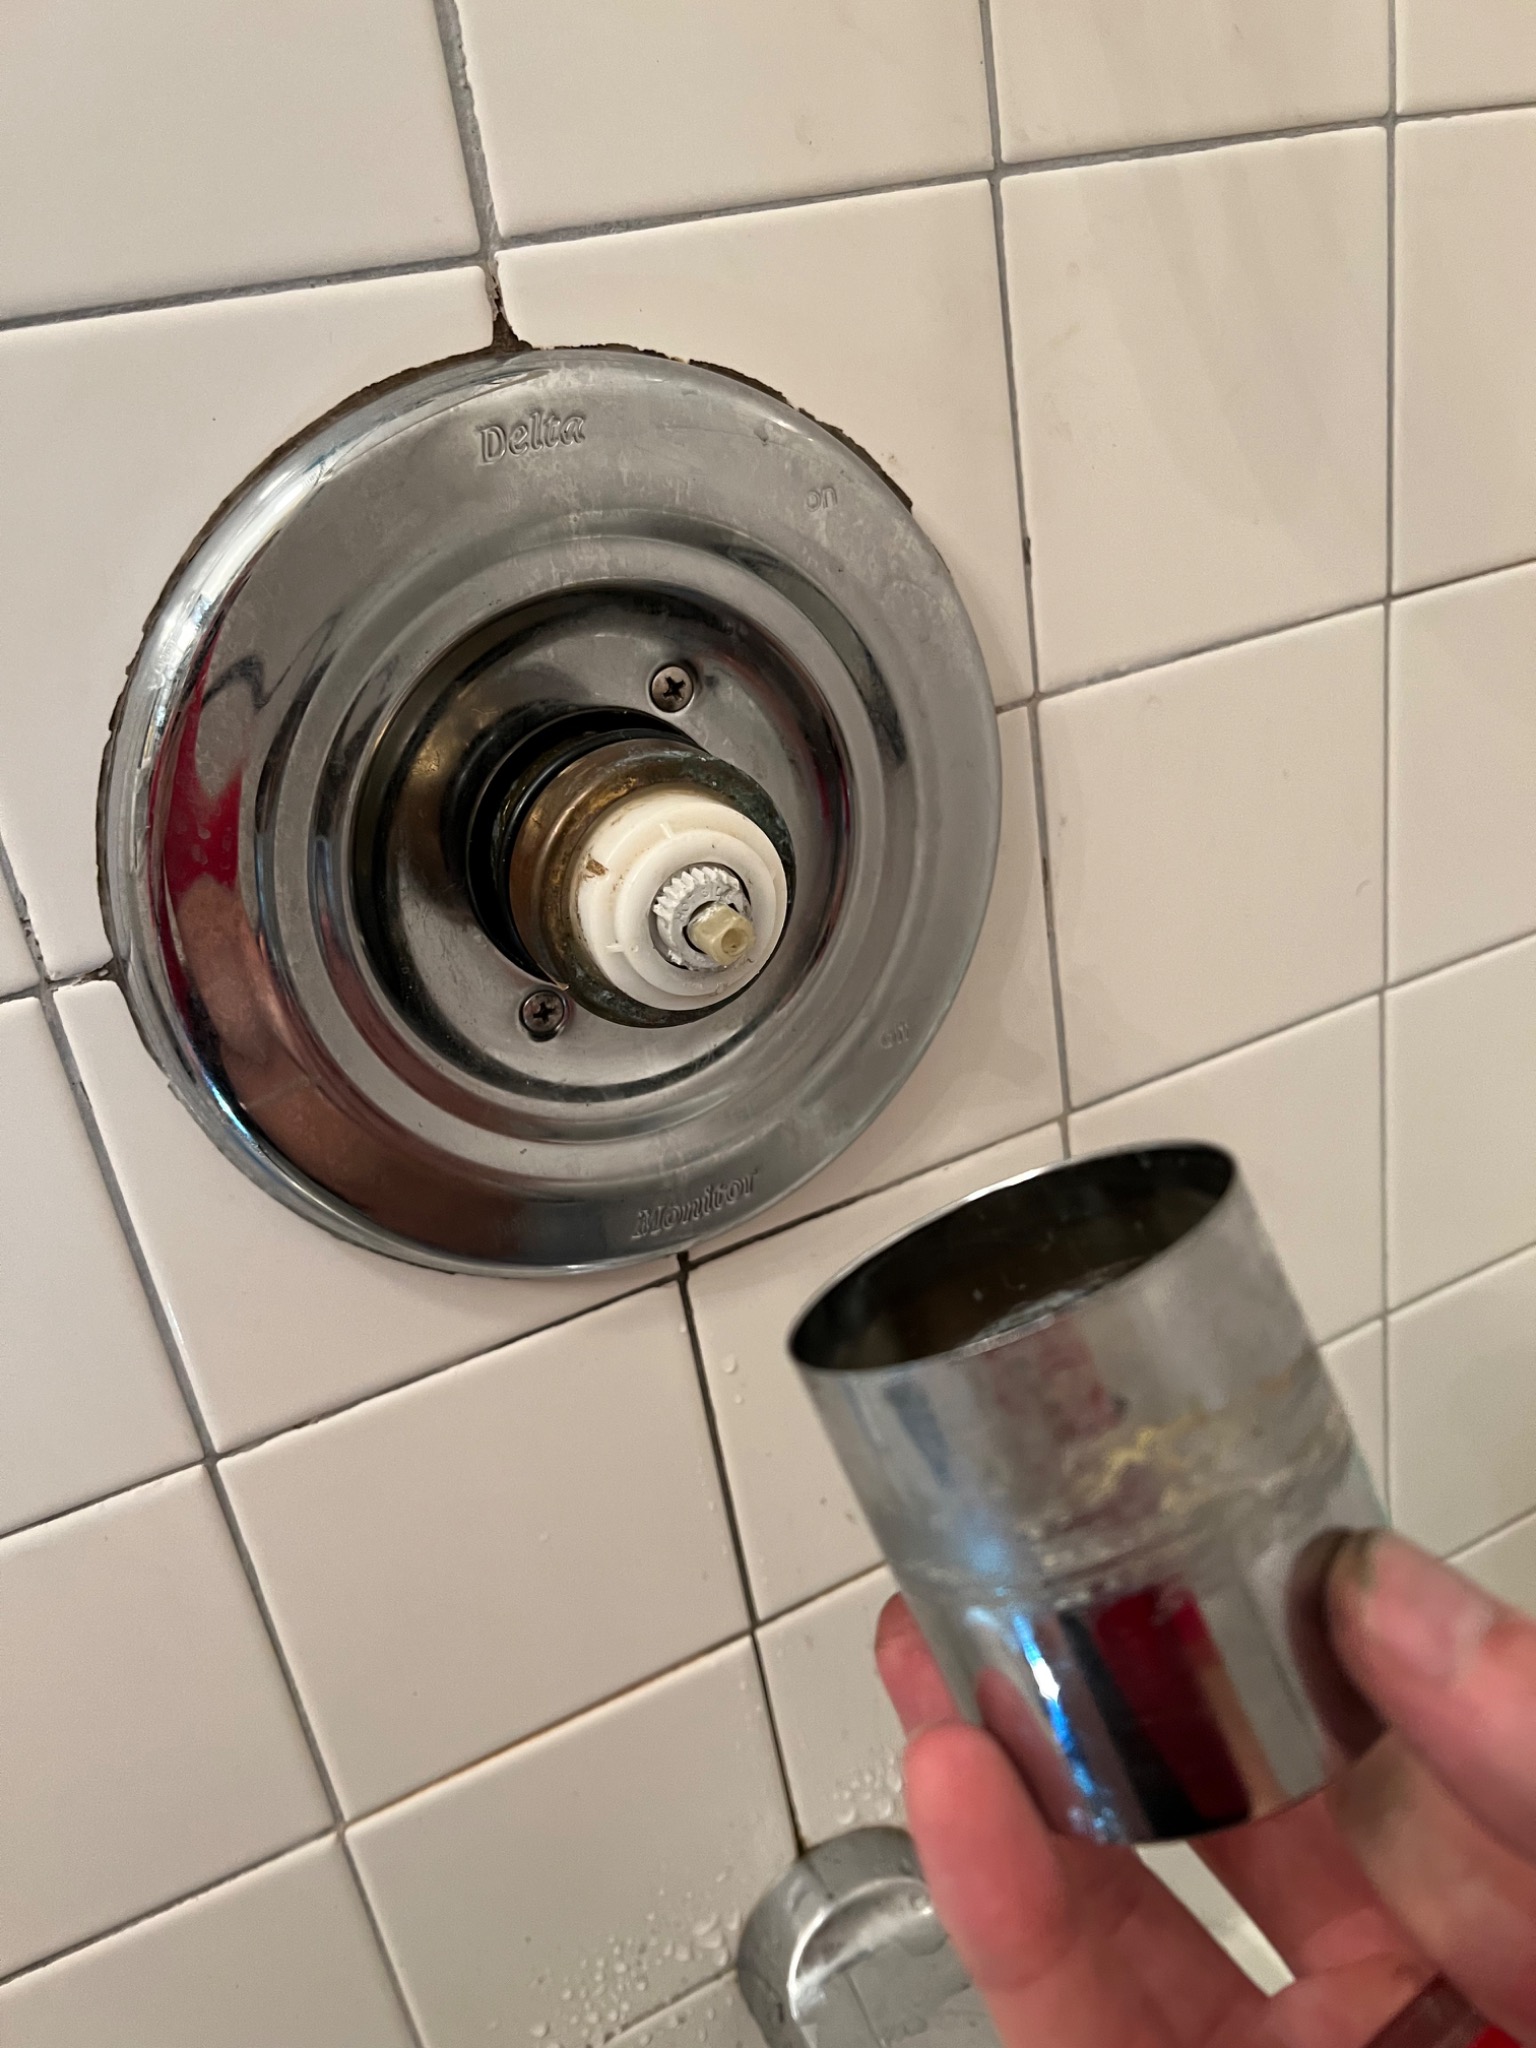
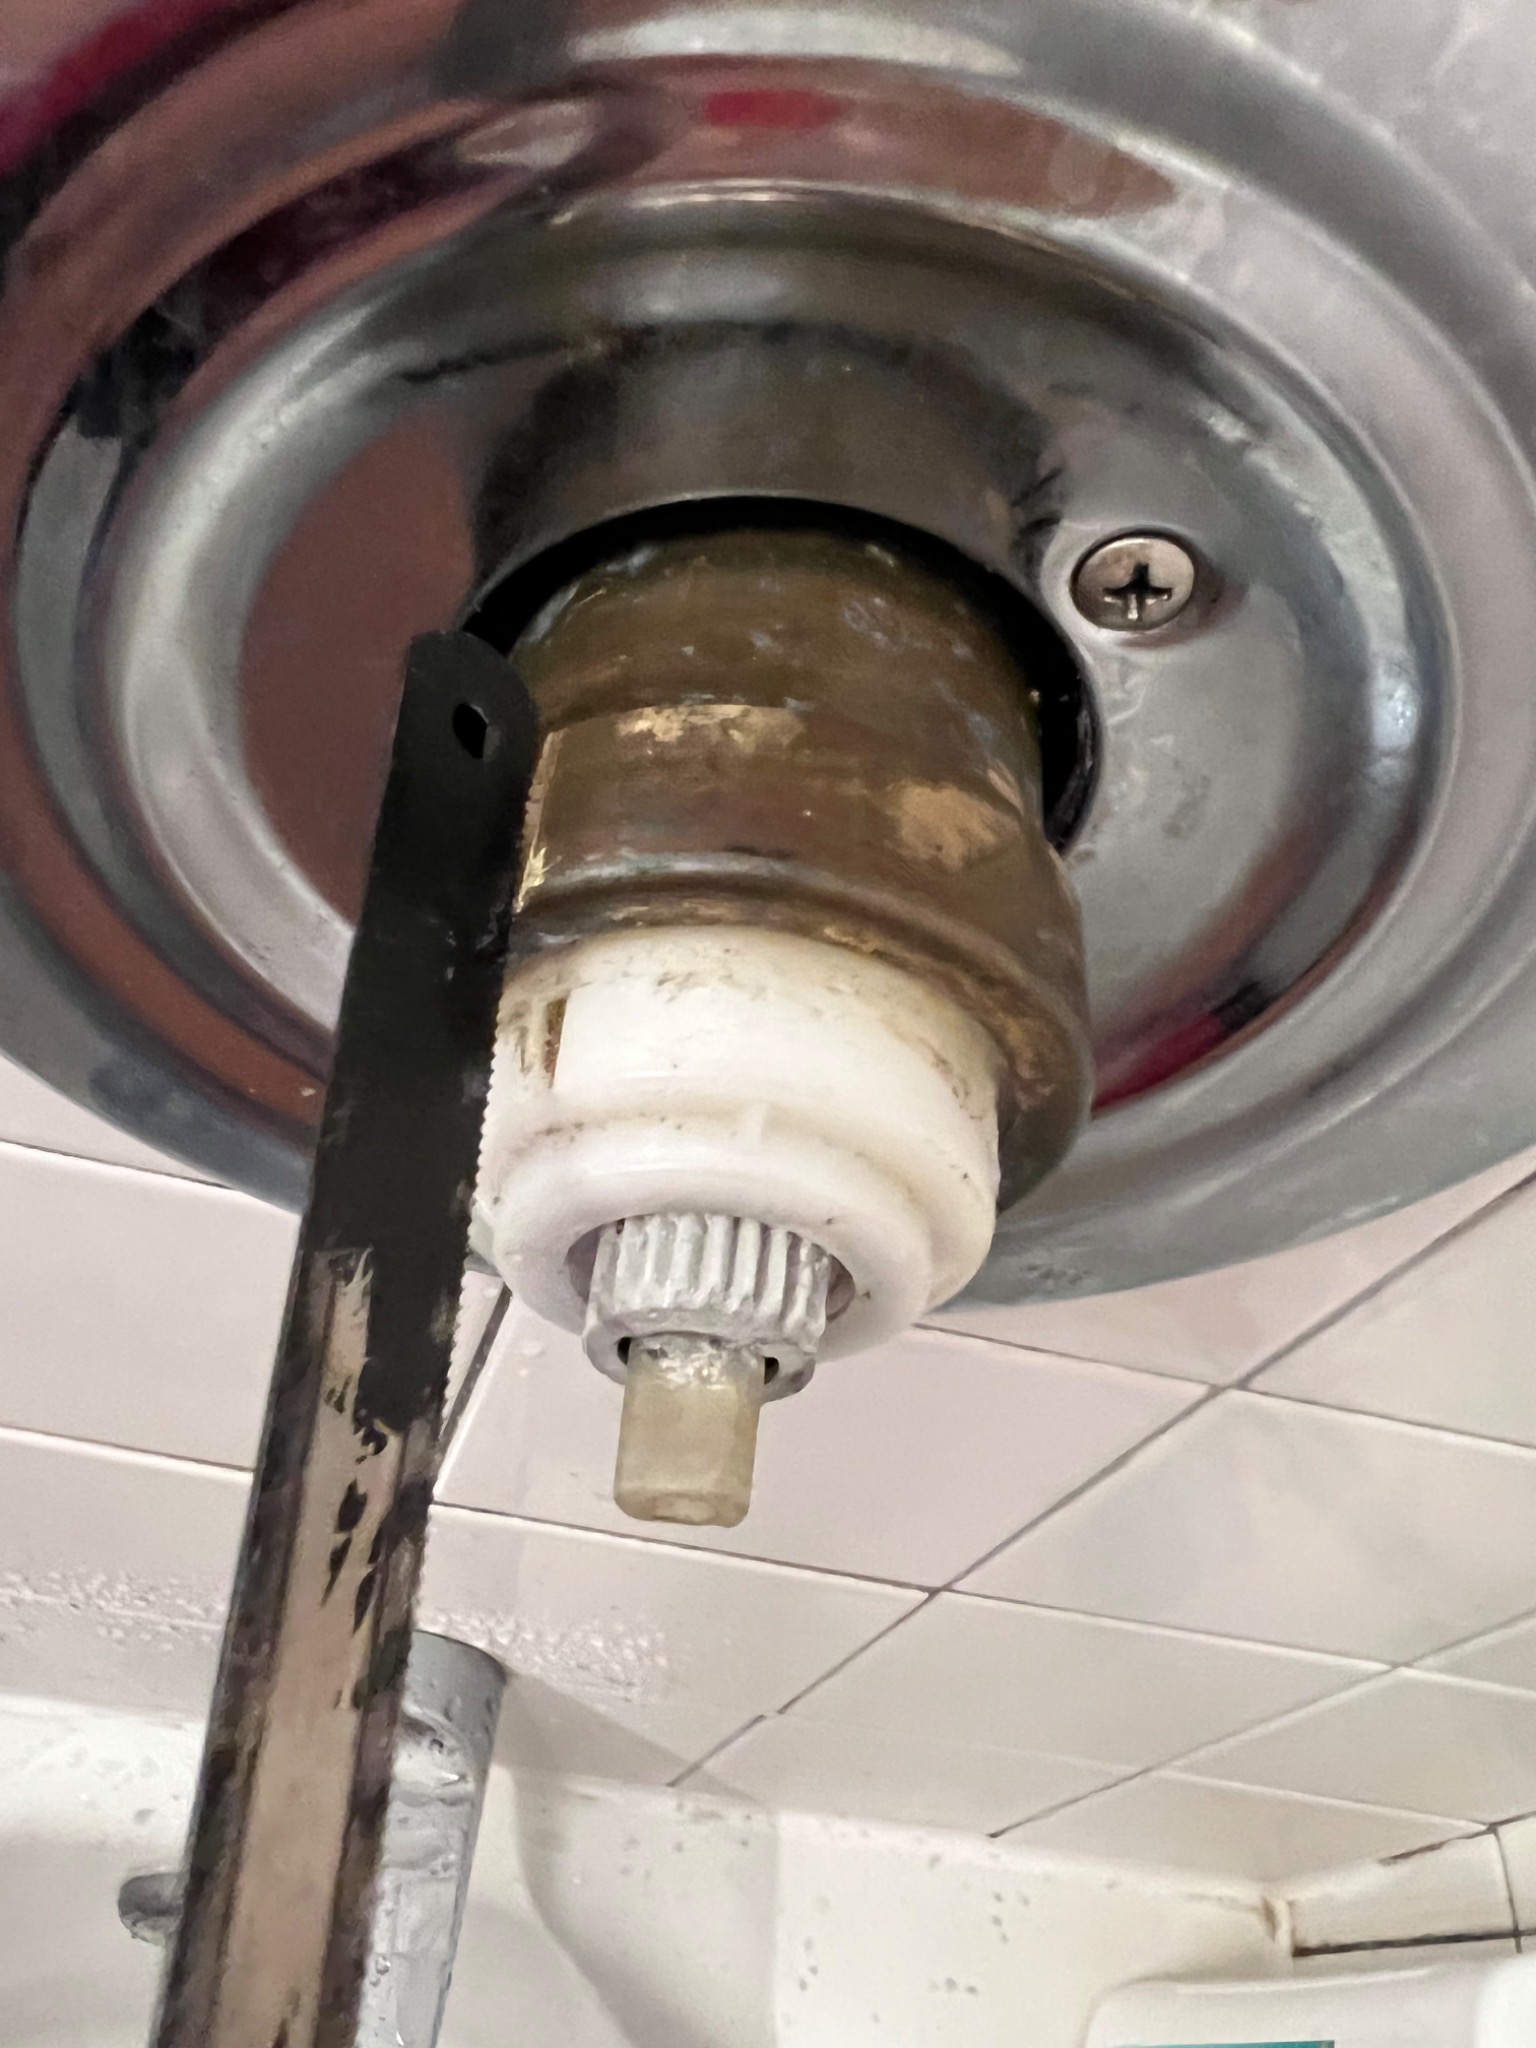
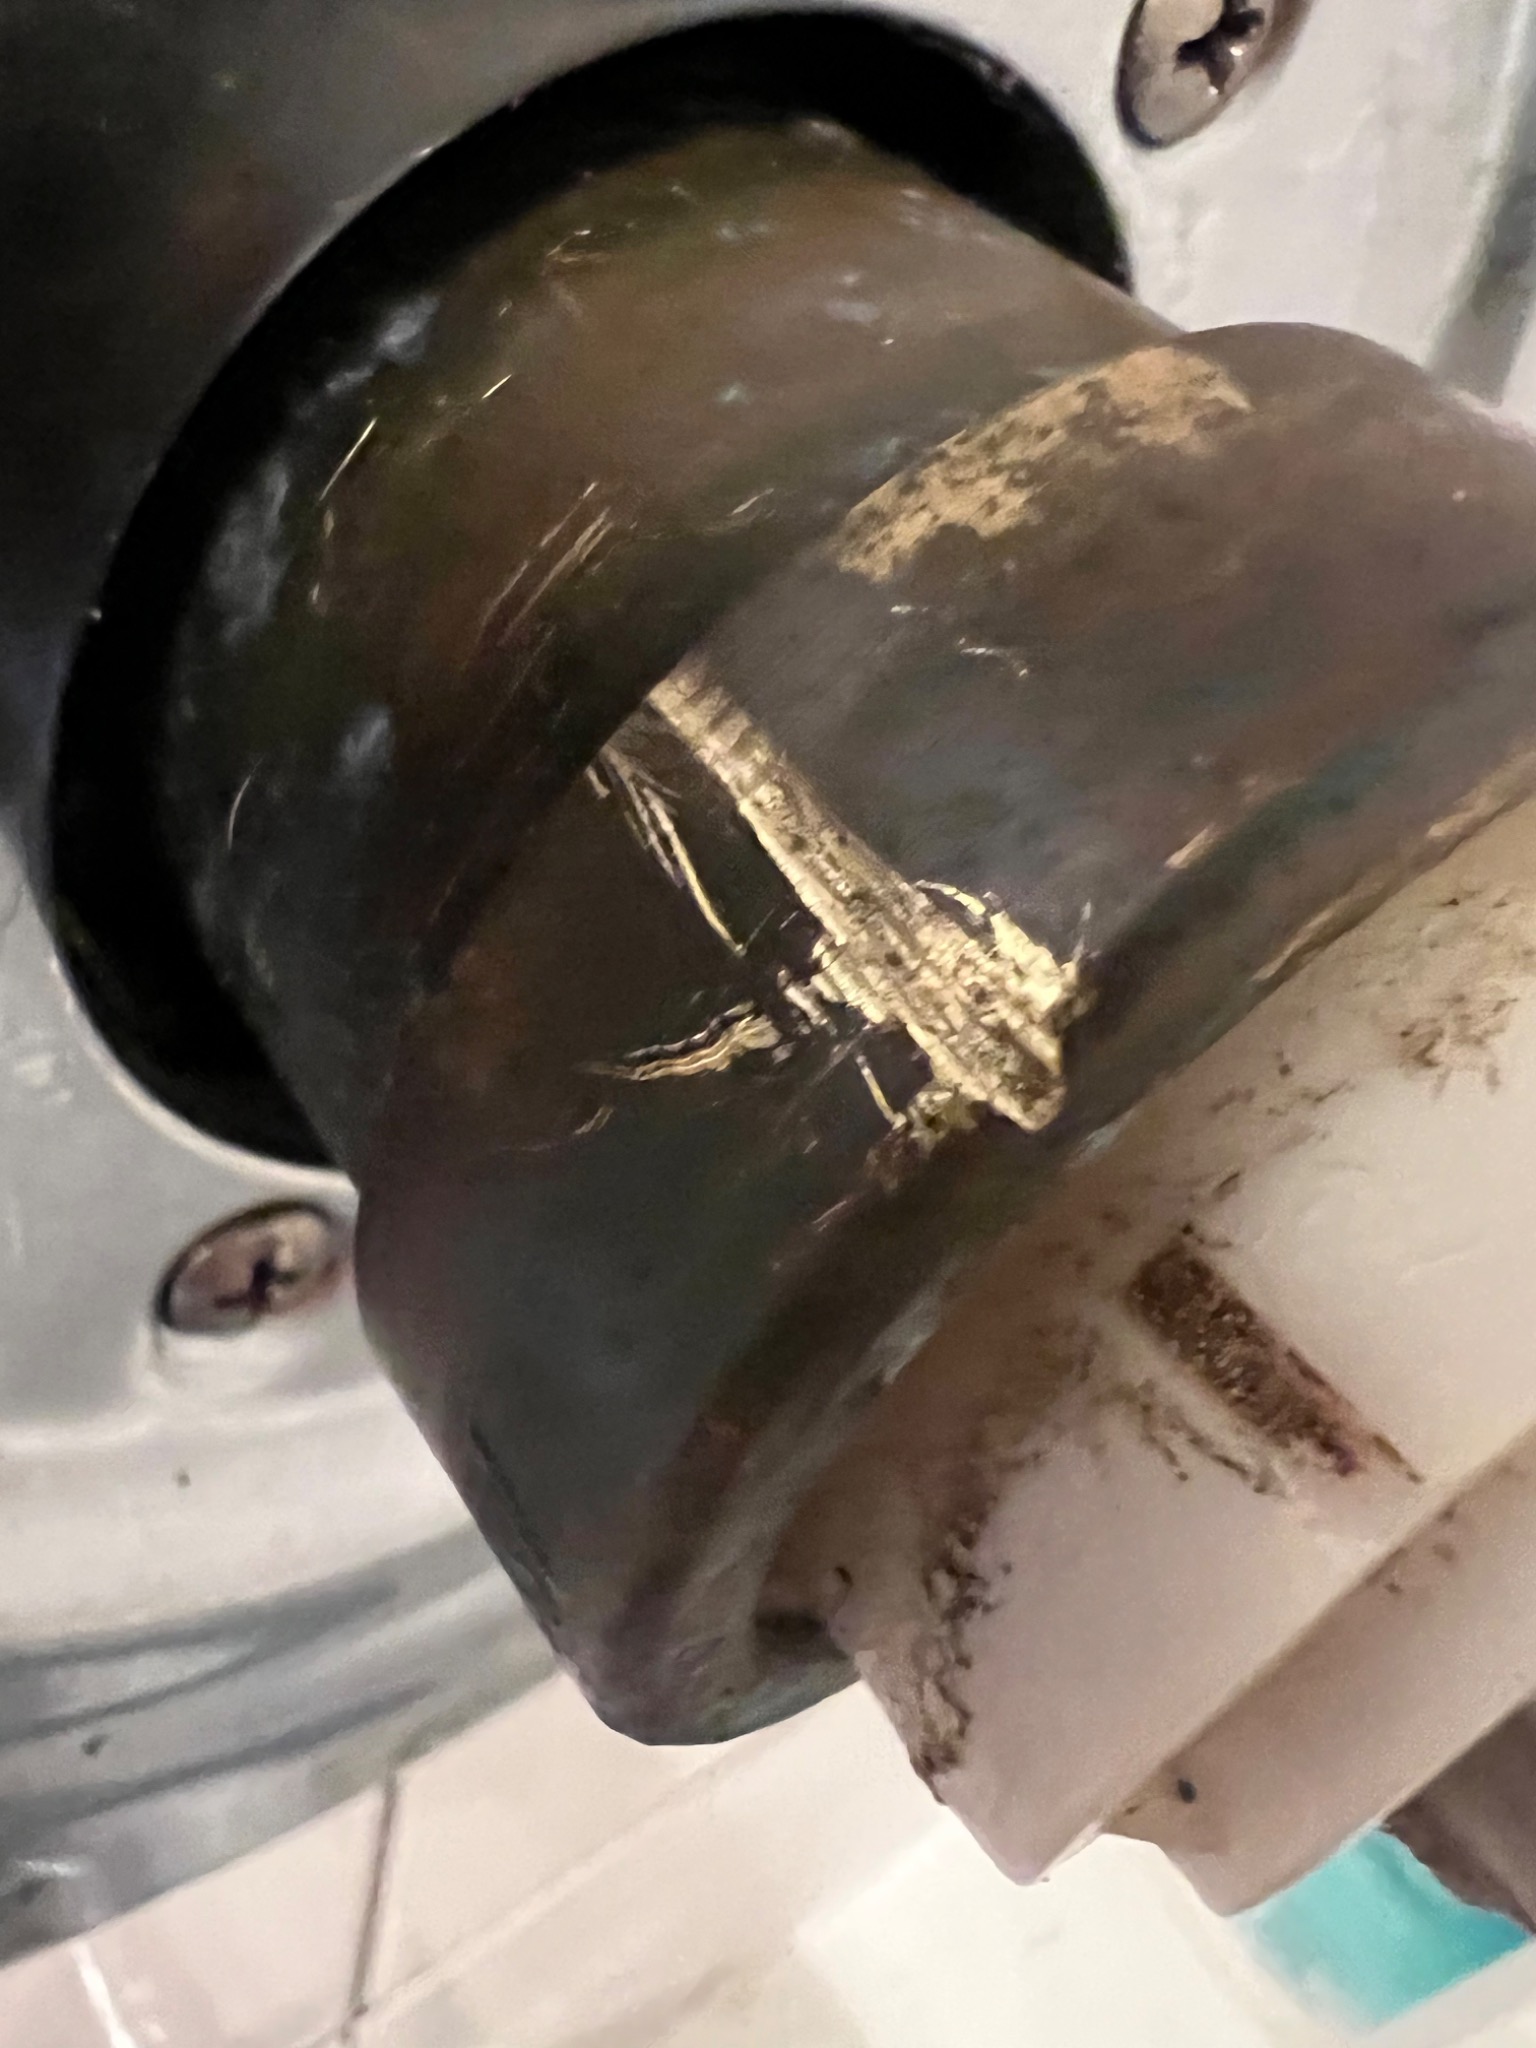
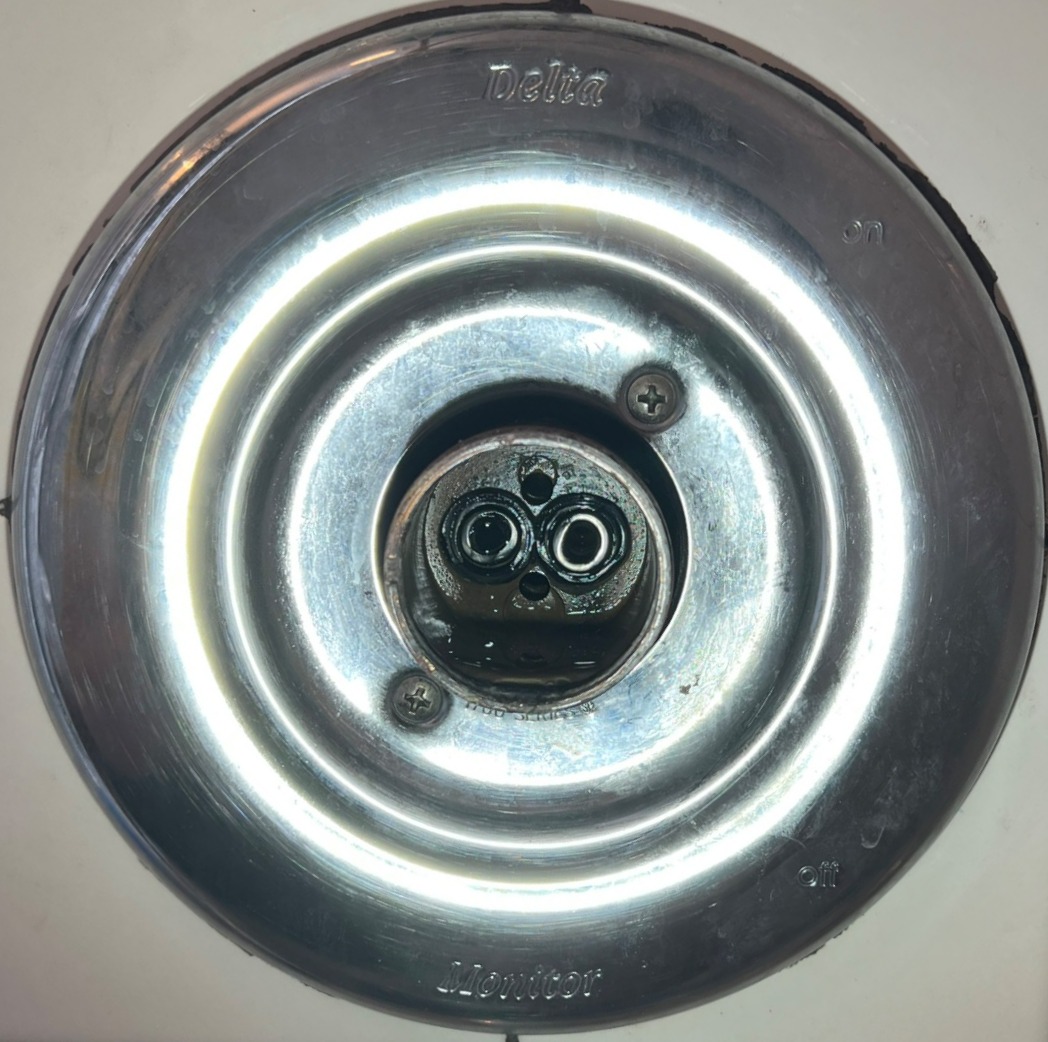
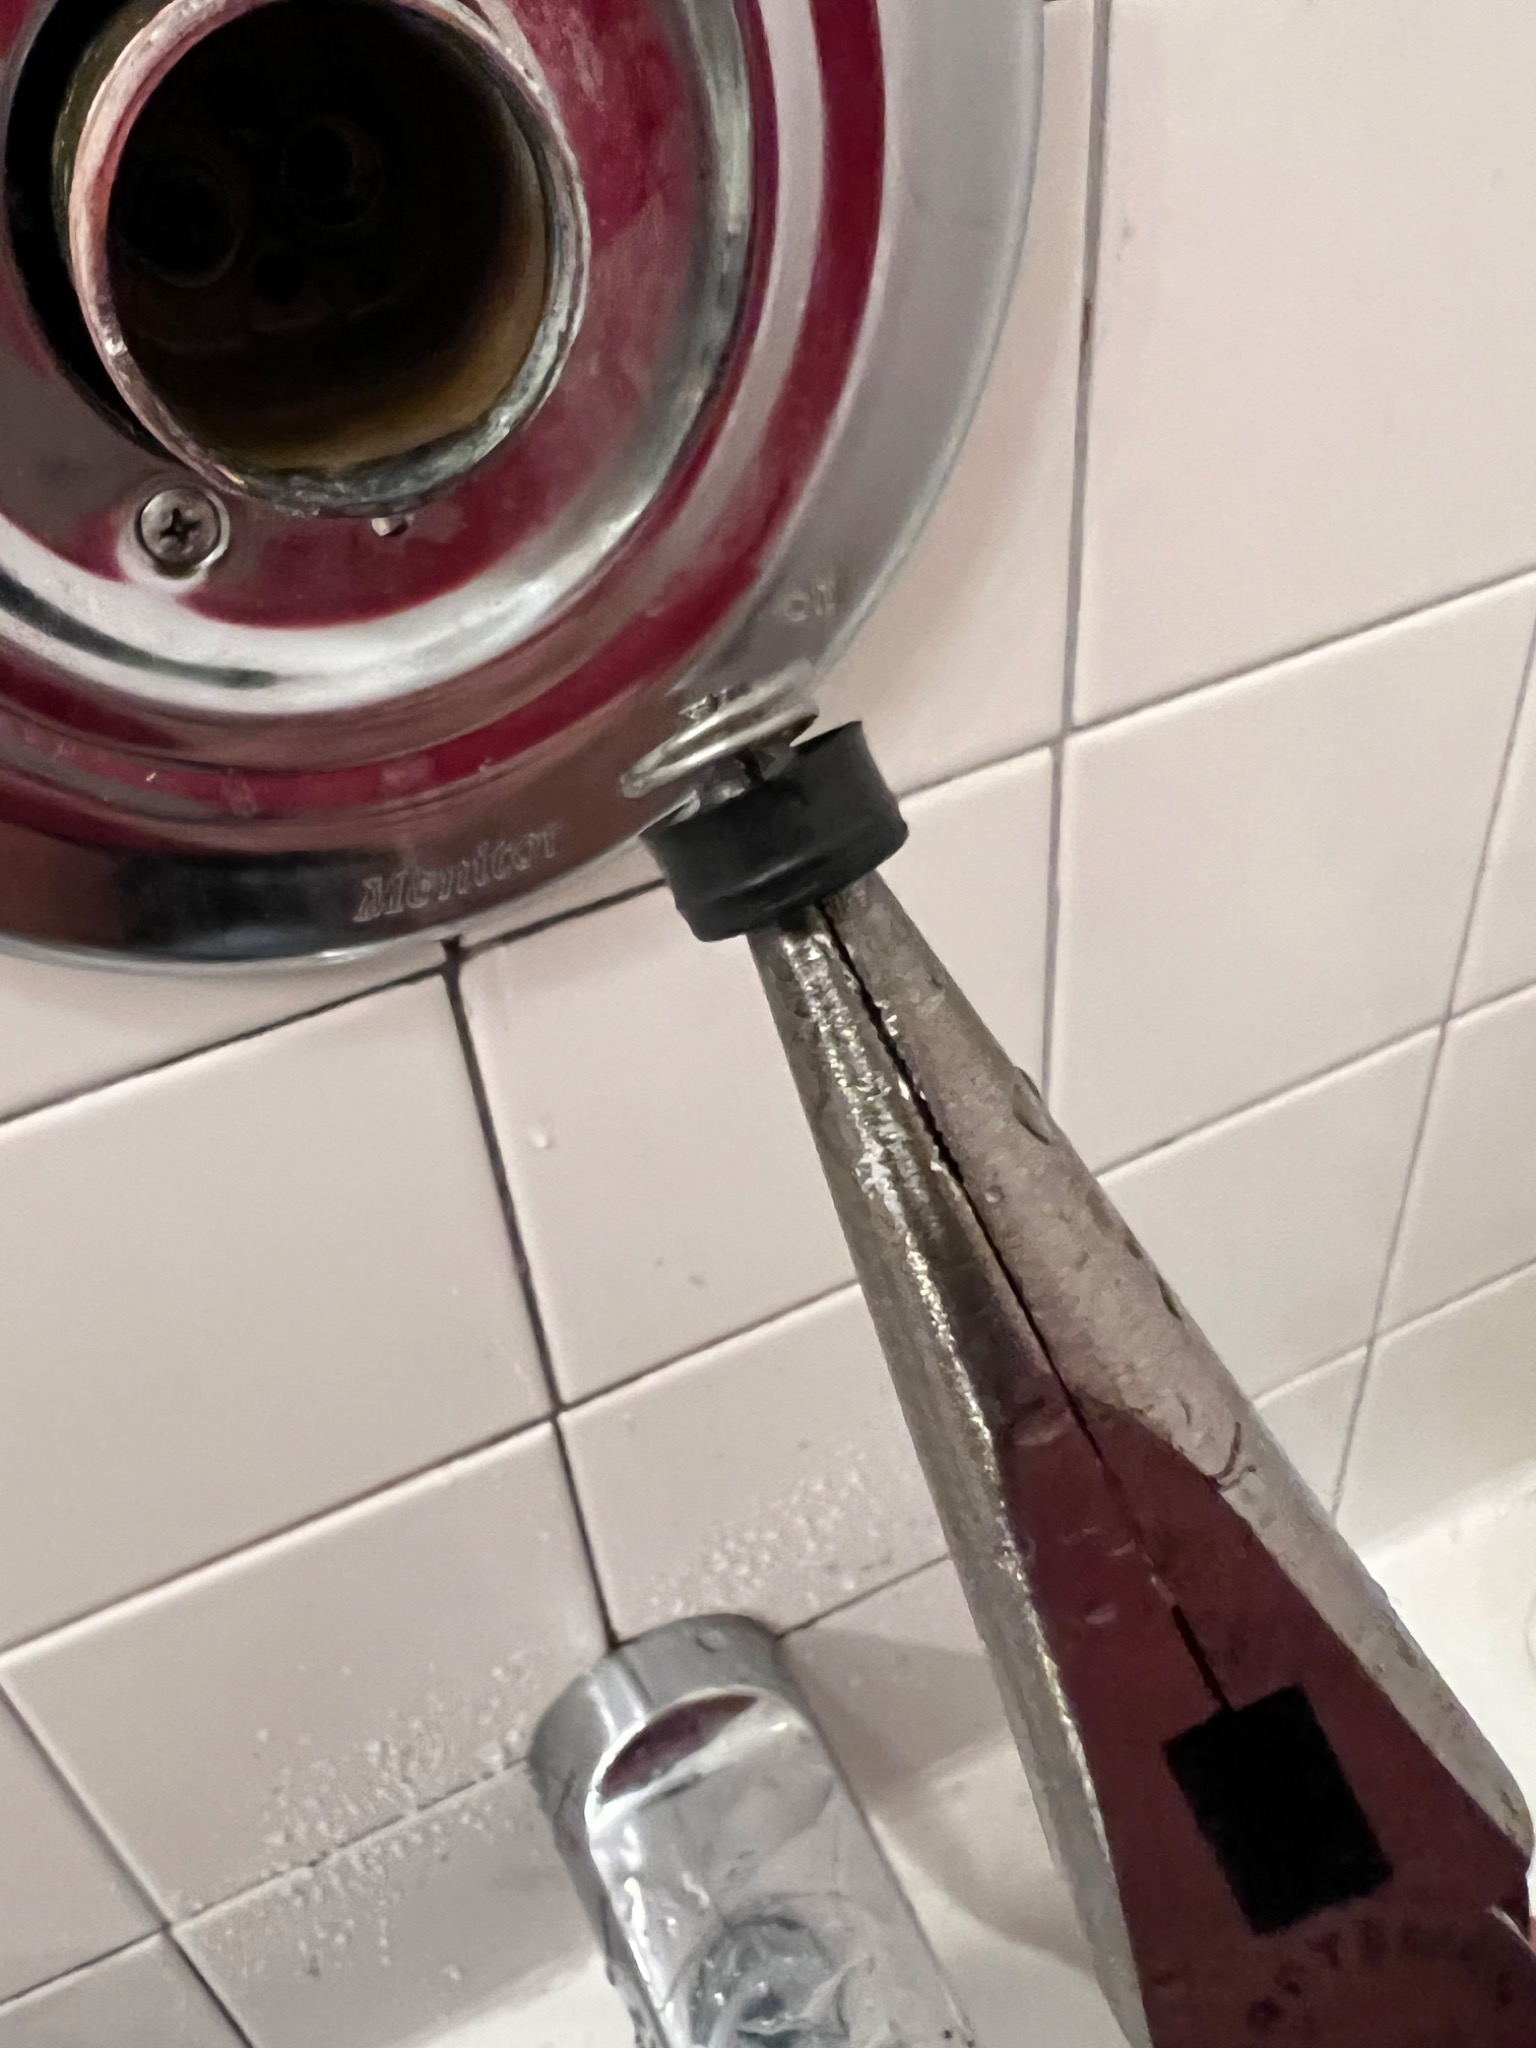
6) Remove the bonnet nut (brass ring).
Remember how above in part 2 I wrote about how this project could turn into a multi-day one? This is the step that may give you fits.
Many people online complain about how hard it is to remove this brass ring. At one point, I concluded that it was impossible. But, I eventually got it off, so it's possible.
The keys were penetrating oil and patience. I took apart and reassembled the "exterior assembly" five or six times over he course of a week, every time just to reveal the bonnet nut and see if I could make another attempt at removing it. Even though I could not for the first few attempts, every time I got to it gave me the chance to spray a bit more of penetrating oil. Ultimately, I think that just letting the penetrating oil do its job over the course of a week was what enabled me to eventually get the ring off.
We are going to call the next few steps 6a - 6e. Each one is an action that you can try to get the ring off. Any one or a combination of these ideas may work for you. It just depends on your particular assembly.
Lastly, remember to not be overly aggressive. I read stories and watched videos of people who accidentally damaged the pipe assembly in the wall behind this knob and created for themselves a much larger, more expensive project.
6a) Try with your hand.
If this actually works, thank God.
6b) Try a channellock.
The first few times I tried these, they didn't work.

6c) Spray penetrating oil.
I used PB Blaster. Remember--I repeated this step several times--every time that I took apart the exterior assembly.

6d) Saw a groove in the ring and try to knock it loose with a hammer + screwdriver.

6e) Try the channellock again.
This is what finally worked for me--Letting the PB Blaster do its job over several days and then using the channellock when they could grab better hold of the ring using the groove that I had sawed.
Here is how it looks without the bonnet nut:
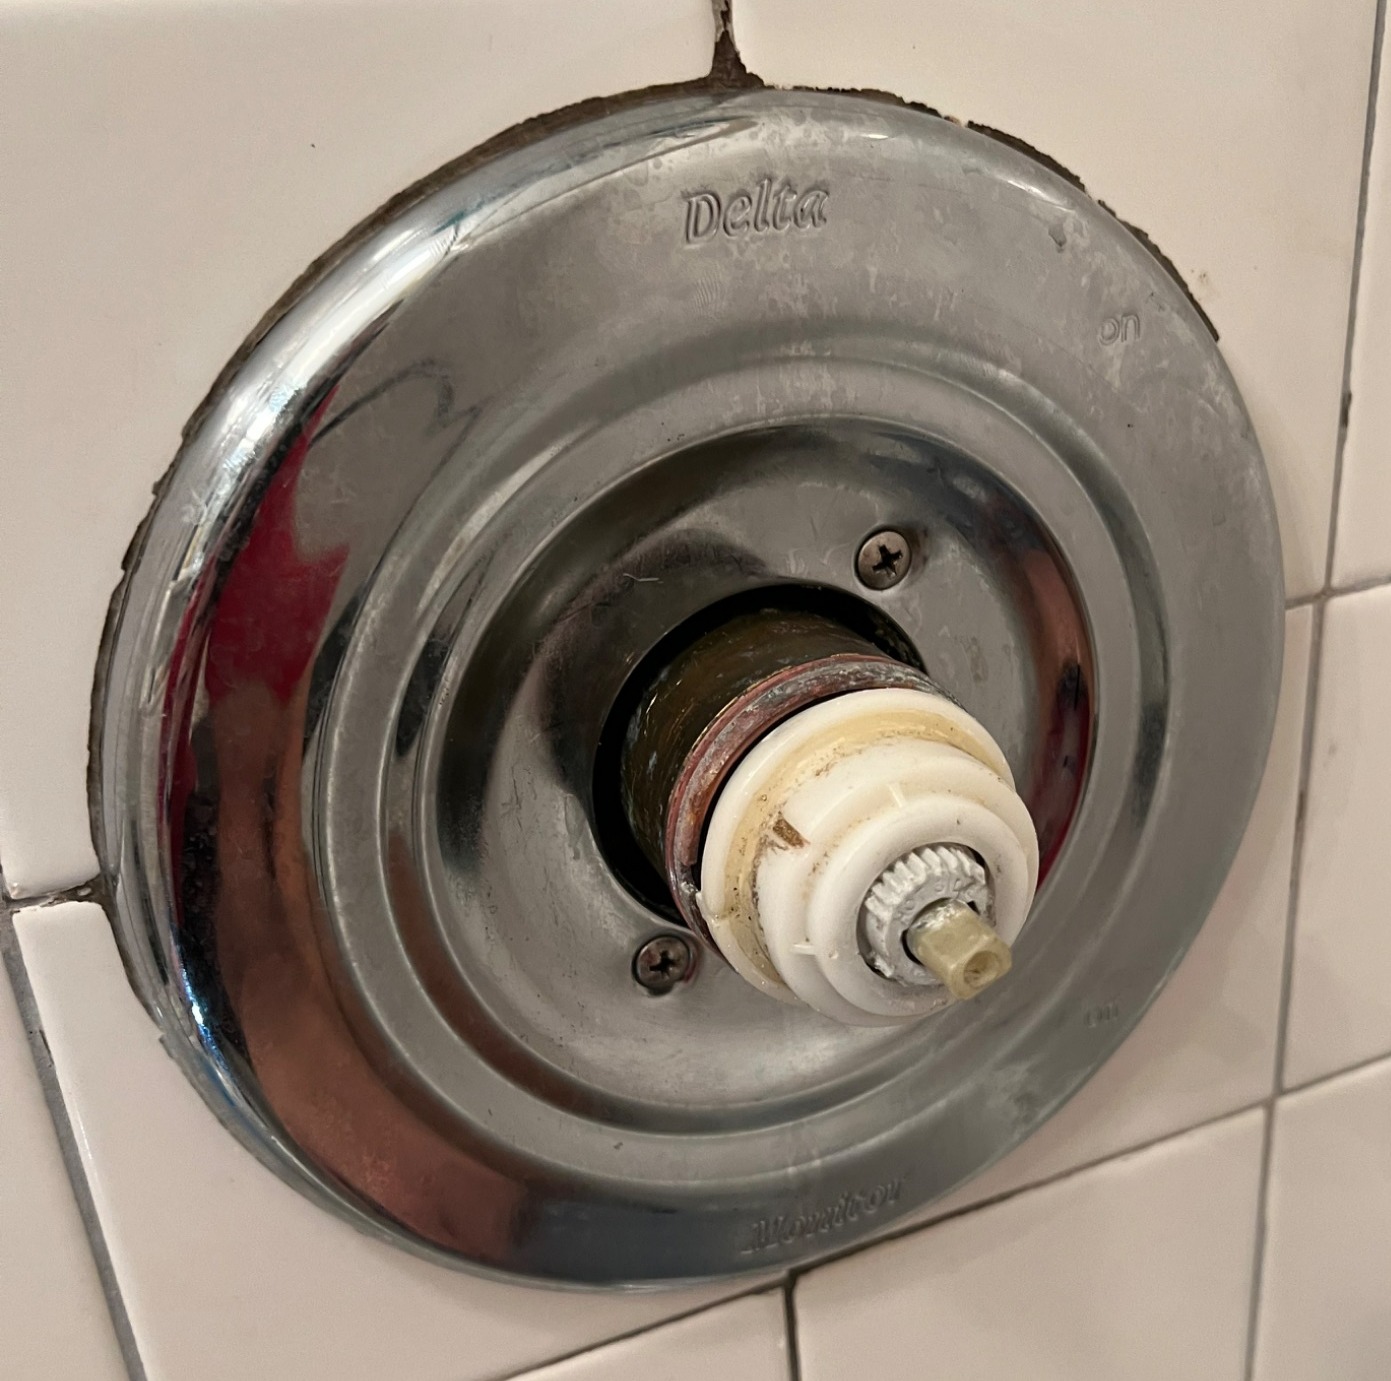
7) Remove the cartridge.
If the front of your cartridge is white, it was made before 2006. If the front is gray, it was made after 2006. It is important to distinguish the cartridge model so that you buy the right cartridge in case you need to replace it.
Mine was made before 2006.

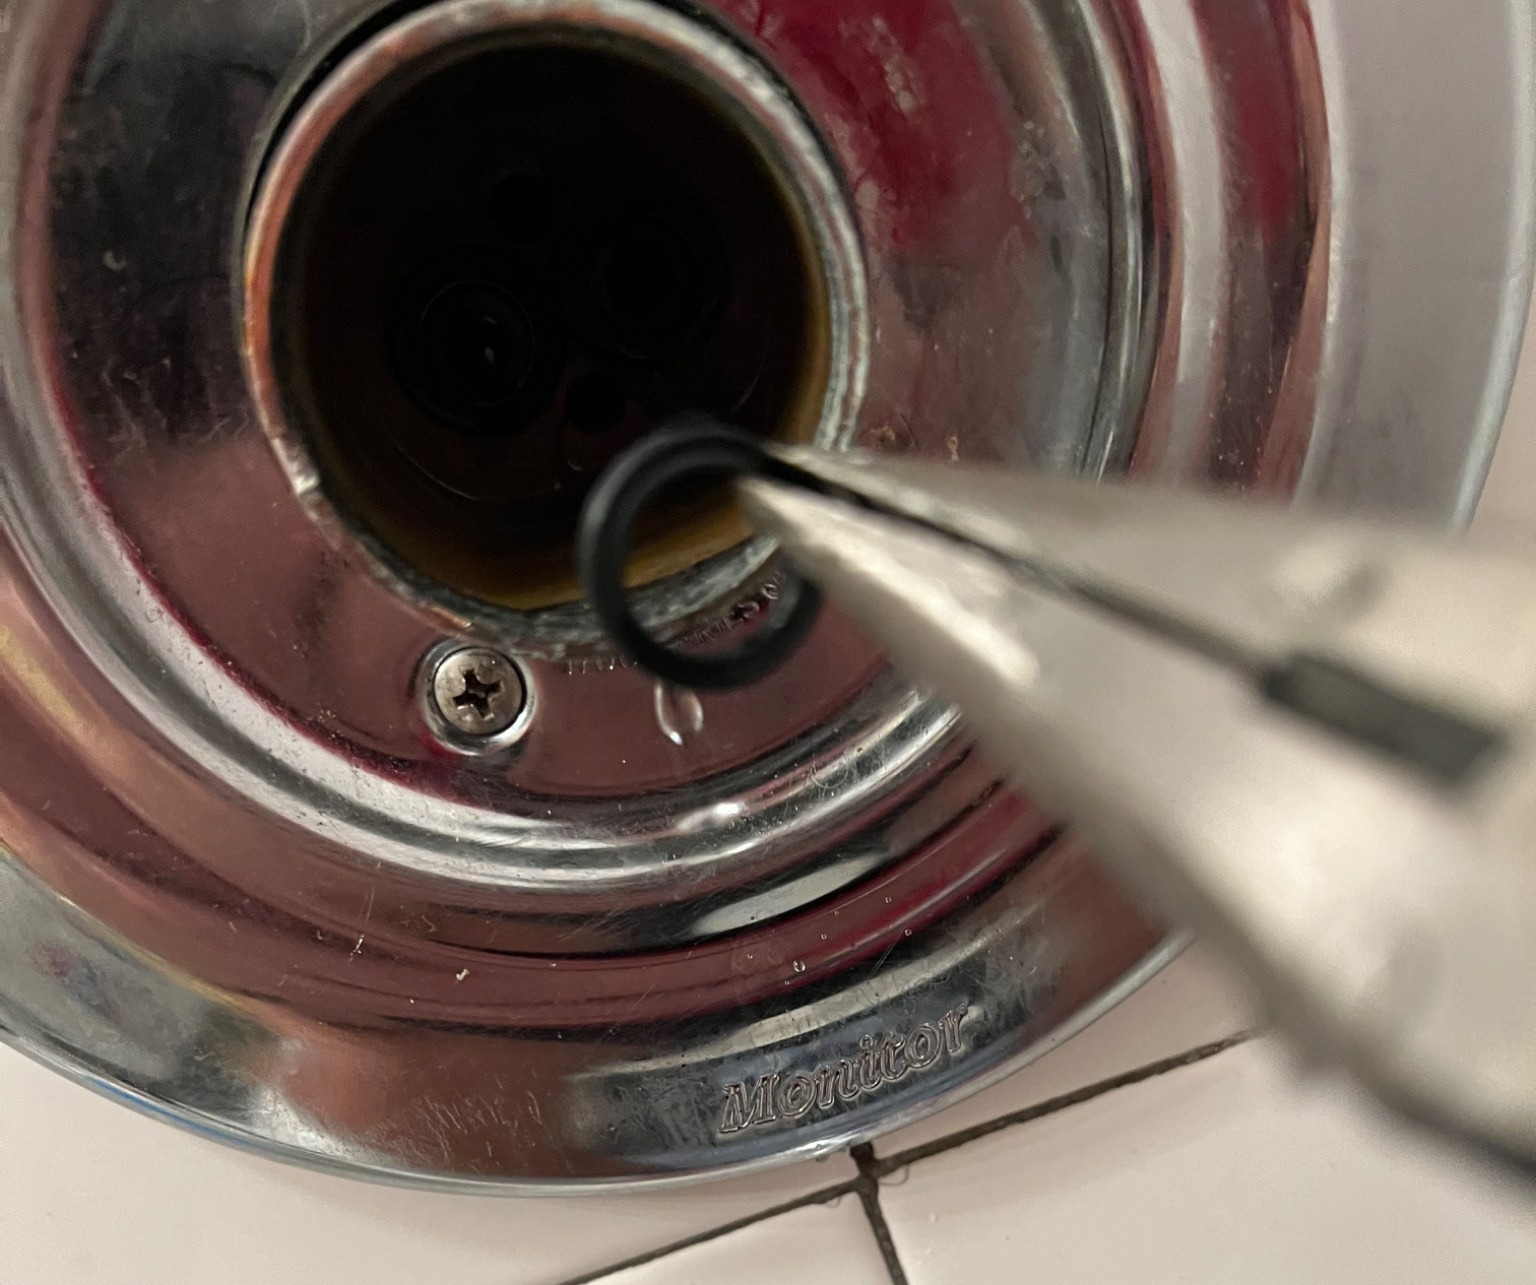
8) Remove the old springs and washers.
First, below, you can see what the base behind the cartridge looks like.
I had to use pliers to pull out the springs and rubber washers.
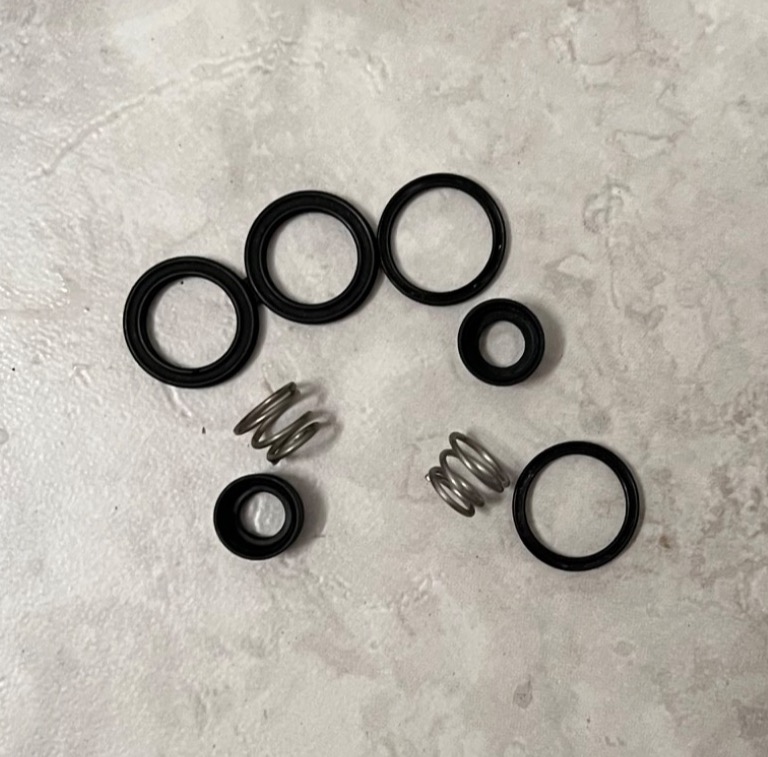
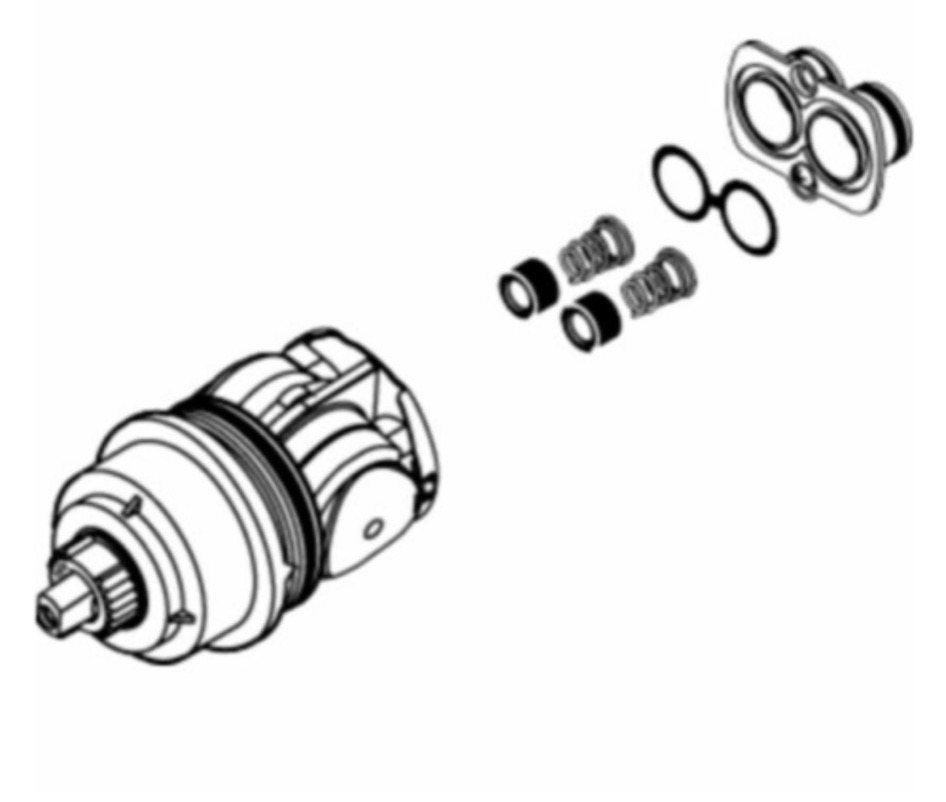
9) Install the new springs and washers.
These are the parts that Delta Faucet sent me for free. The second picture below breaks down the assembly part-by-part well for you so that you can make sure you are installing the springs and washers correctly.
It was too hard for me to insert them with my fingers, so I used the pliers like you can see in the third picture below.
10) Put everything back together.
11) Test the water temperature.
Unplug the drain, turn the water back on, and test to make sure that you have the cold-hot water range that you want.
12) Check for no drip.
This is the whole reason you did the project, right? Say a prayer and then turn off the water to make sure that the slow drip you had before is now gone.
13) Revel in satisfaction.
If you're like me, you'll purposely and unnecessarily walk past your finished project multiple times over the next few days just to refresh feelings of pride and satisfaction until it wears off and you decide to move onto to a new obsession at your home.
Post a comment